Seaside Chic Tablescape: How We Designed Our Lakeside Moonlight & Morsels Gathering
Shop the lookWhen the Moonlight & Morsels Cancer Dinner Experience was first dreamed up (remember our mood board post) as part of our Cosmic Dinner Series, we knew one thing for sure: water would take centre stage.
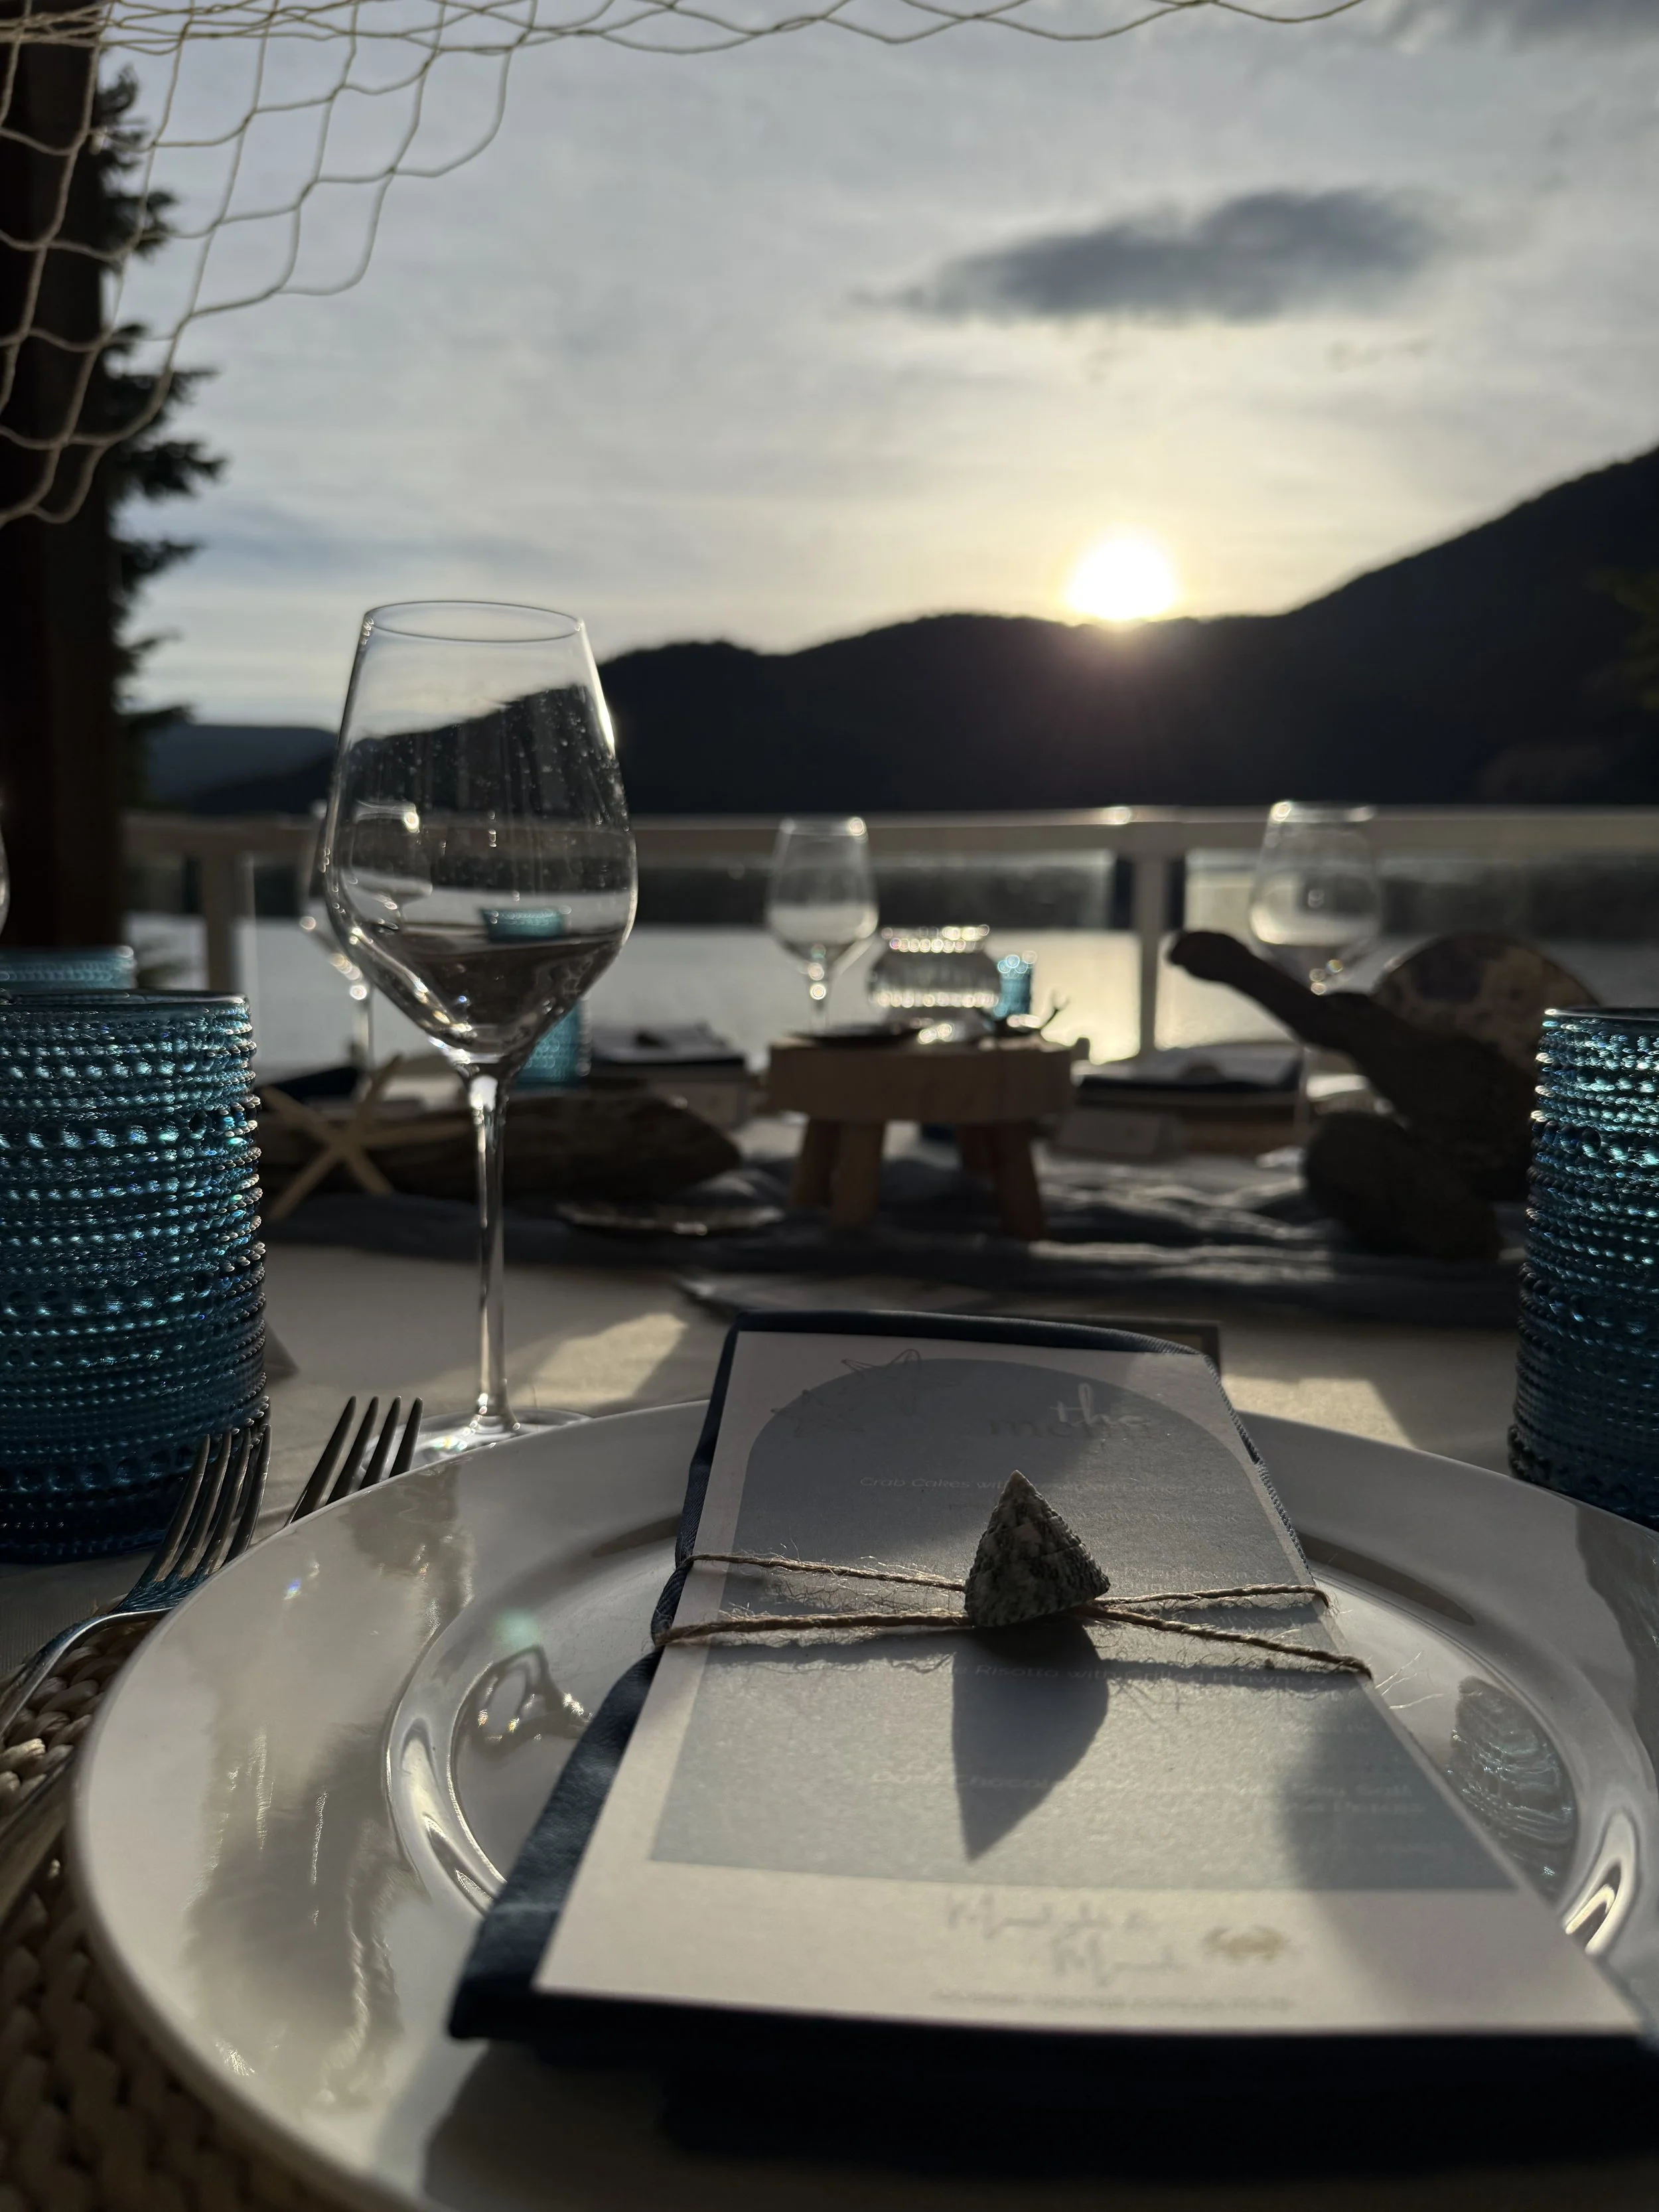
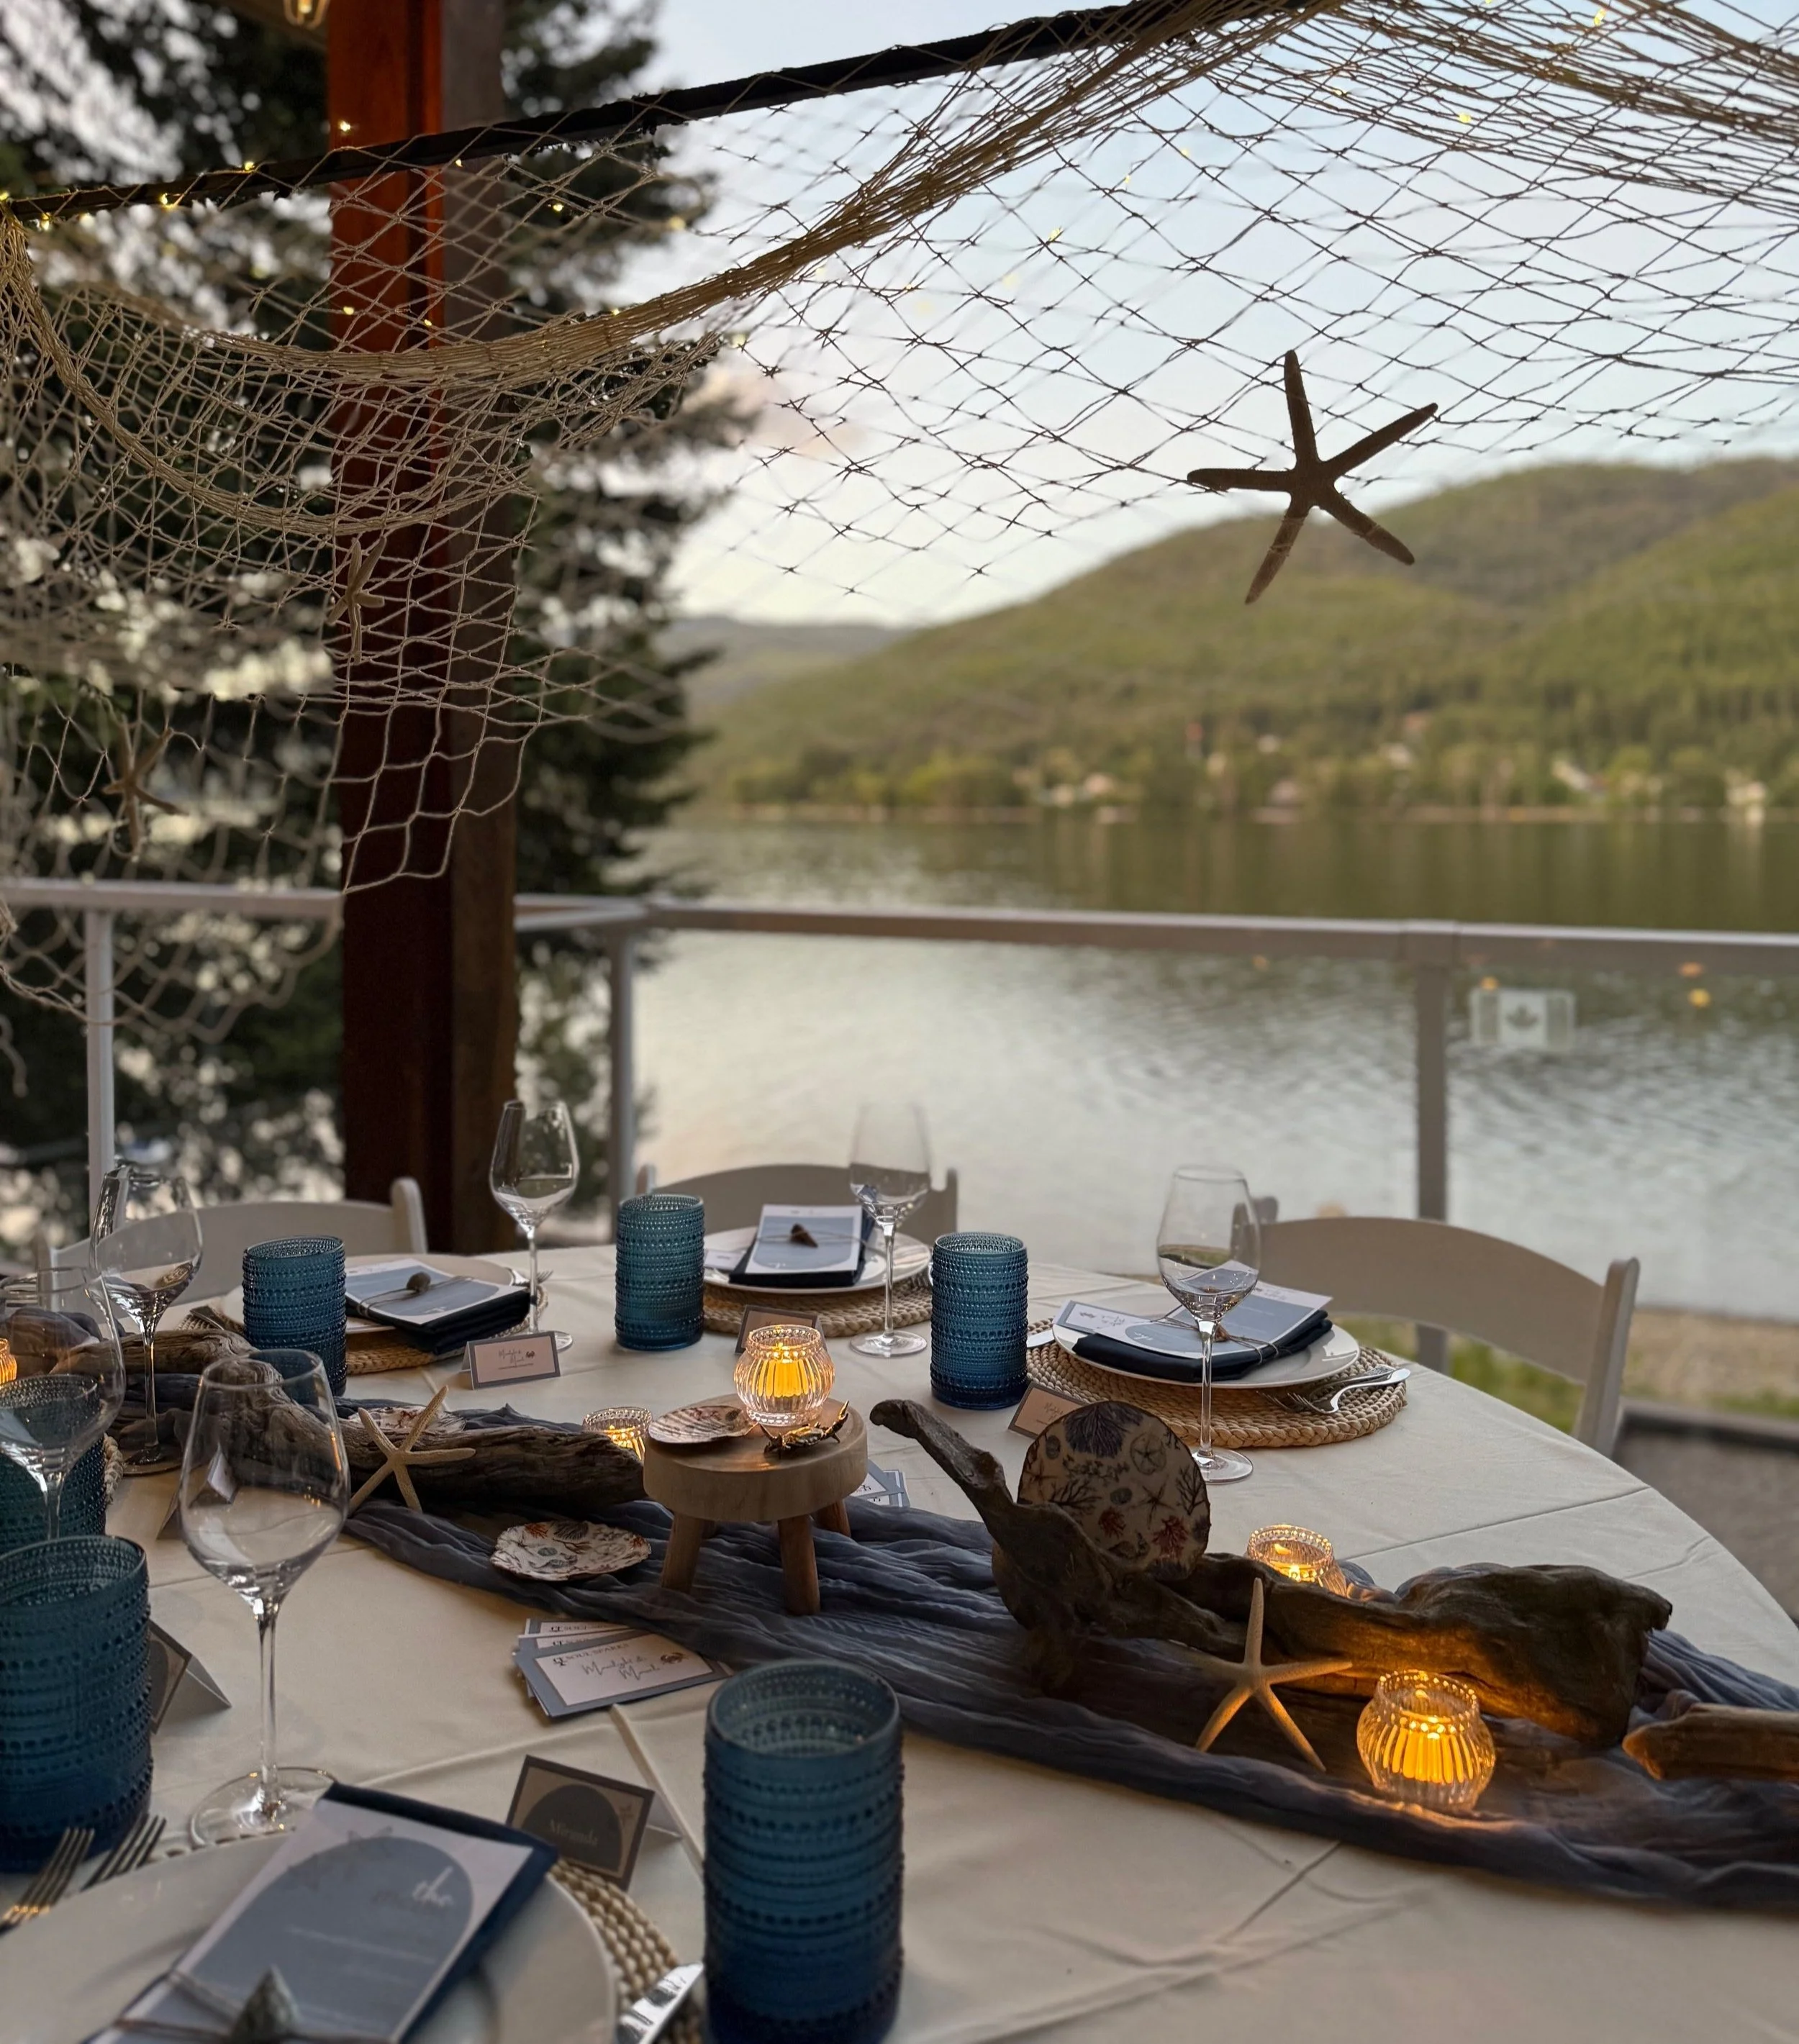
Cancer is the first water sign we’ve hosted for this collection, and we wanted to feel fully immersed in its element. But here’s the thing — we’re not exactly coastal, we’re inland. Luckily, our little piece of paradise here is surrounded by sparkling lakes that glimmer under the moonlight just as beautifully as any ocean shoreline. This is our kind of seaside. So we packed up our tables (literally rented two big round ones), headed down the road, and set the scene for what became one of our most magical gatherings yet.
In this post, we’re pulling back the curtain to share exactly how we created our Seaside Chic Tablescape — from the colour palette inspired by nature itself to the handmade details that made it feel extra special. Whether you’re planning your own lakeside dinner party, a coastal tablescape for summer, or just gathering your crowd for a little moonlit magic, these ideas will help you create something unforgettable.
The Inspiration: Water as Our Muse
At Crowded Table by design, we believe every gathering tells a story — and this one began at the water’s edge. Cancer’s nurturing, home-loving, water-sign energy practically begged for us to lean all the way in. But instead of a saltwater shore, we turned to the beautiful freshwater lakes right in our own backyard.
The vibe?
Seaside chic, lakeside edition. Cozy. Elegant. Intentional. And just a little bit magical.
We wanted our guests to feel wrapped in that Cancer comfort: safe, cared for, and completely immersed in the natural beauty around them.
The Colour Palette: Nature Did the Work
One of our biggest hosting secrets? Let nature pick your colours. Standing on the lakeshore, we saw everything we needed: dusty blue skies reflecting off the water, creamy clouds drifting above, and warm sand tones grounding it all.
We anchored our seaside chic tablescape with:
A soft ivory tablecloth for a clean, neutral base.
Dusty blue and navy accents for depth.
Natural wood and sand tones for warmth.
Hints of sparkle that danced like moonlight on the waves.
👉 Hosting Tip: Stick to three core colours drawn from your surroundings to keep your tablescape feeling organic and effortless.
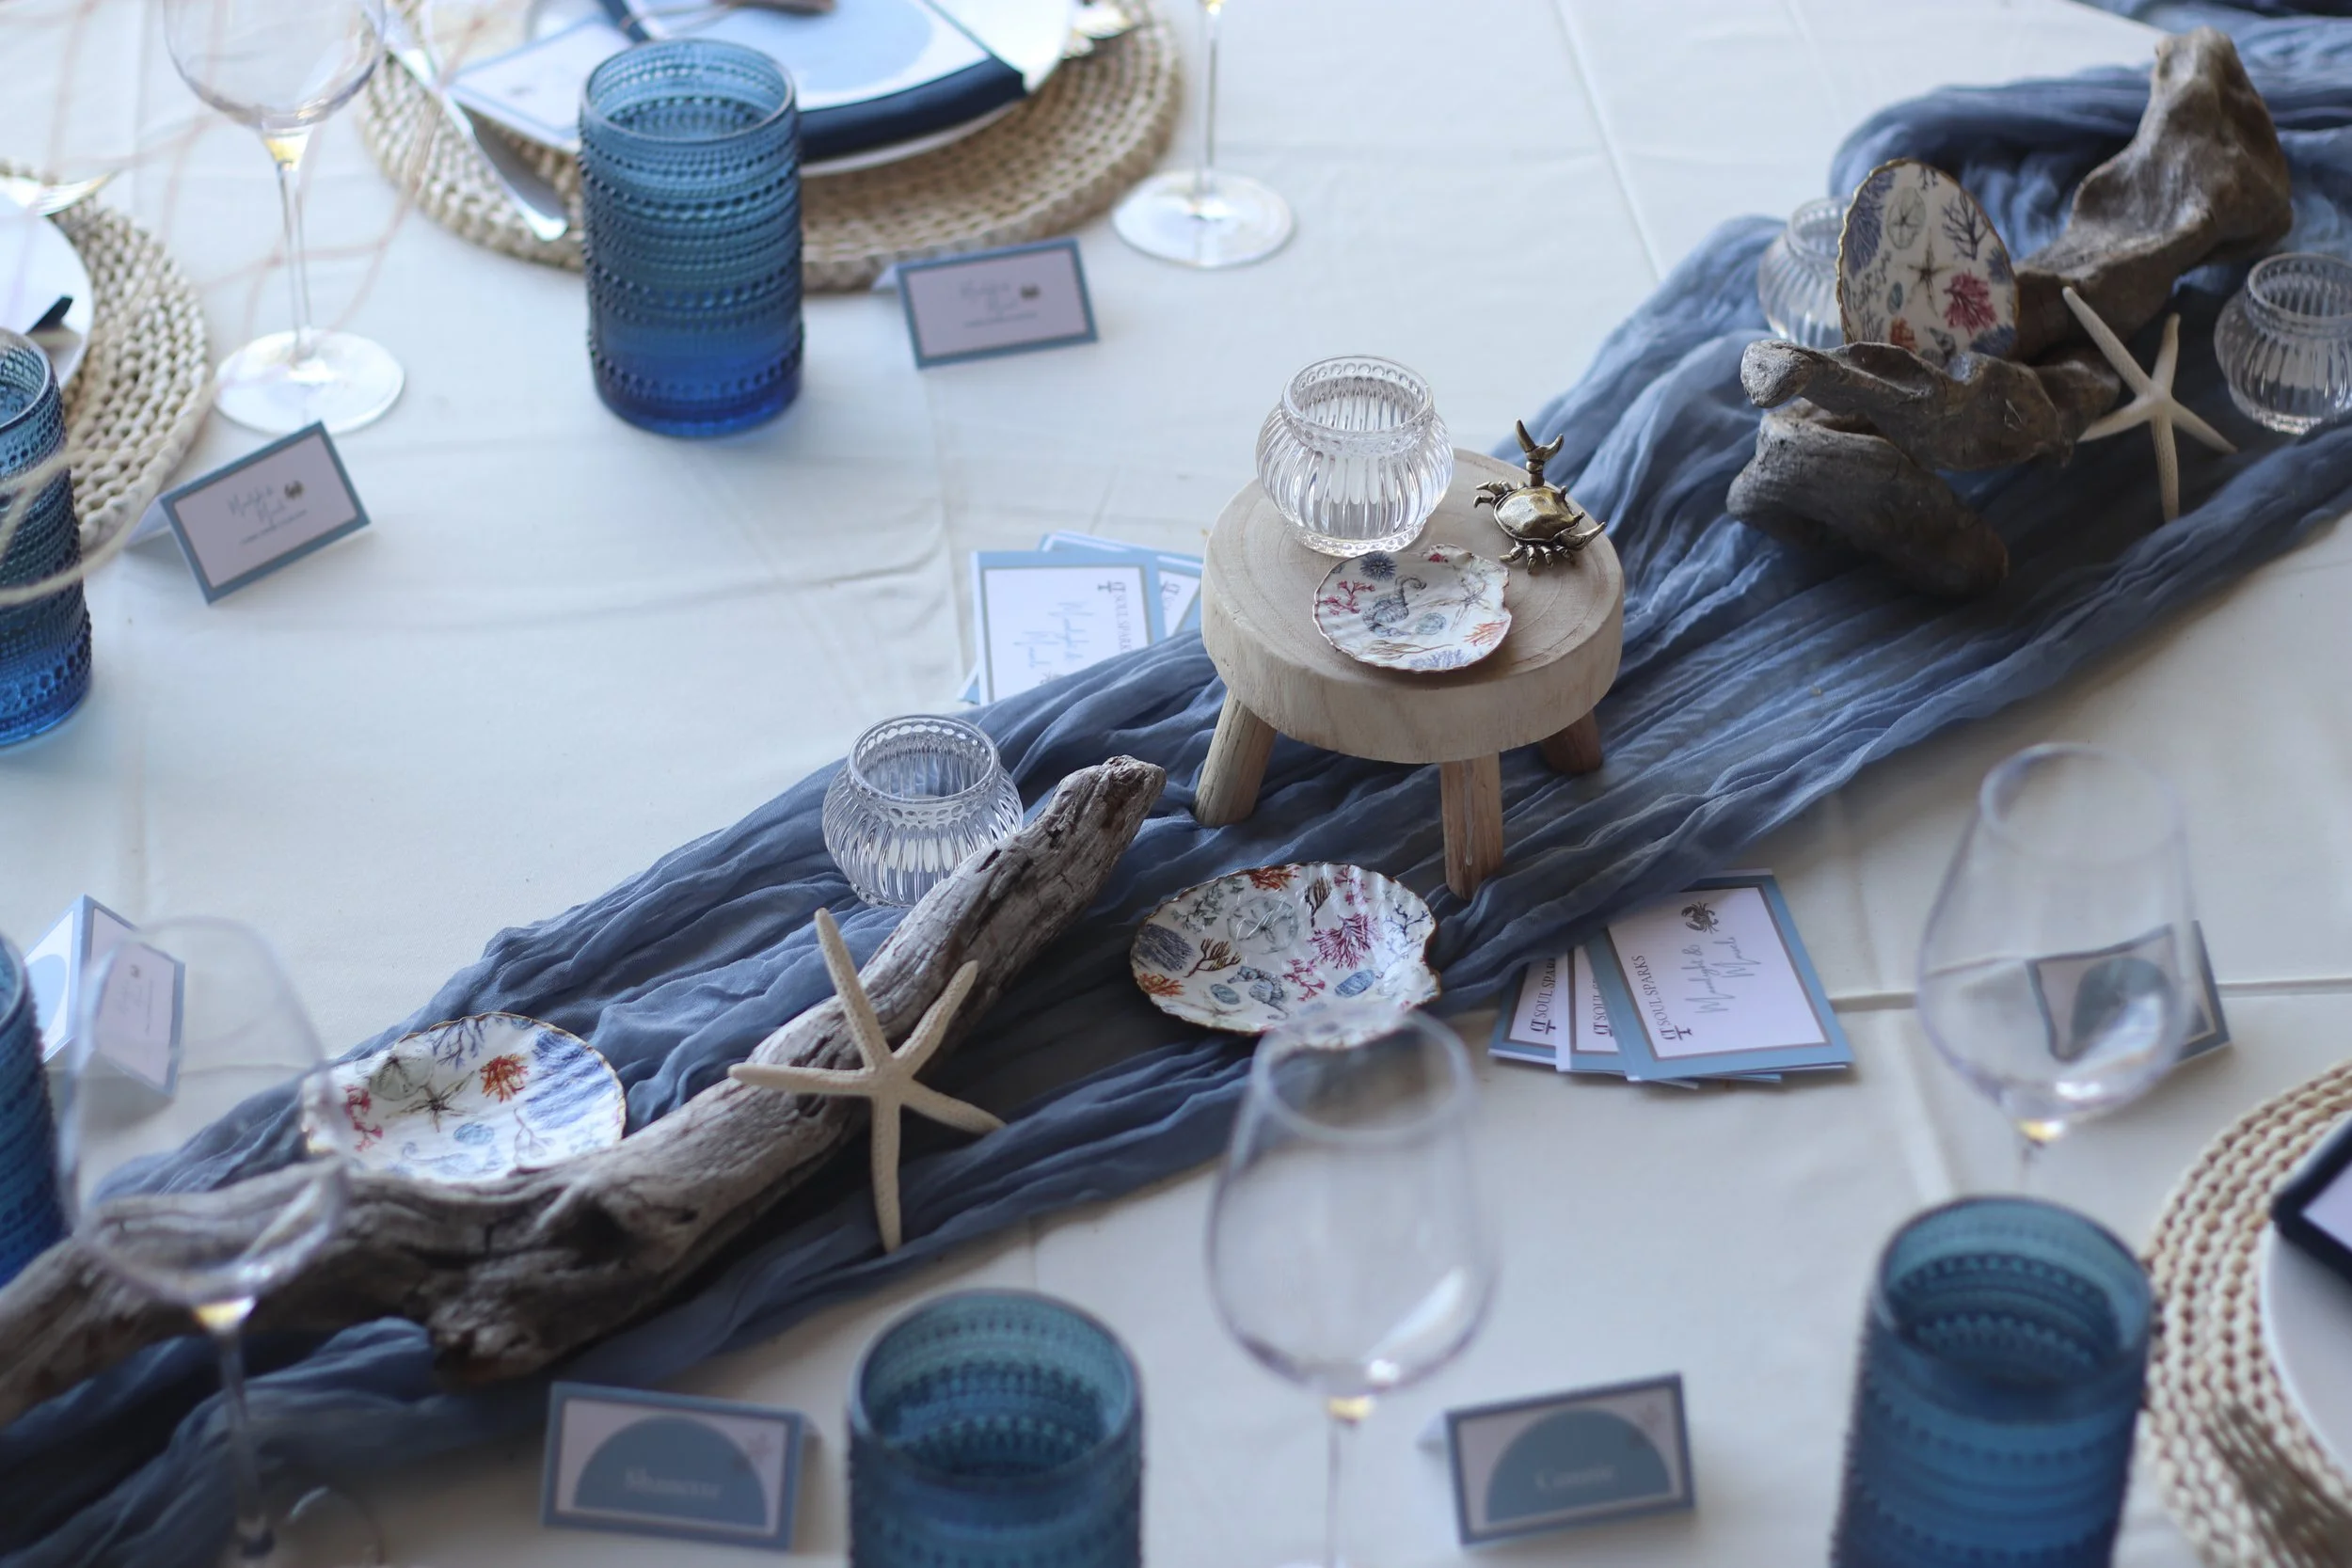
The Foundation Layers: Where the Magic Happens
Once we set our tables lakeside, the layering began.
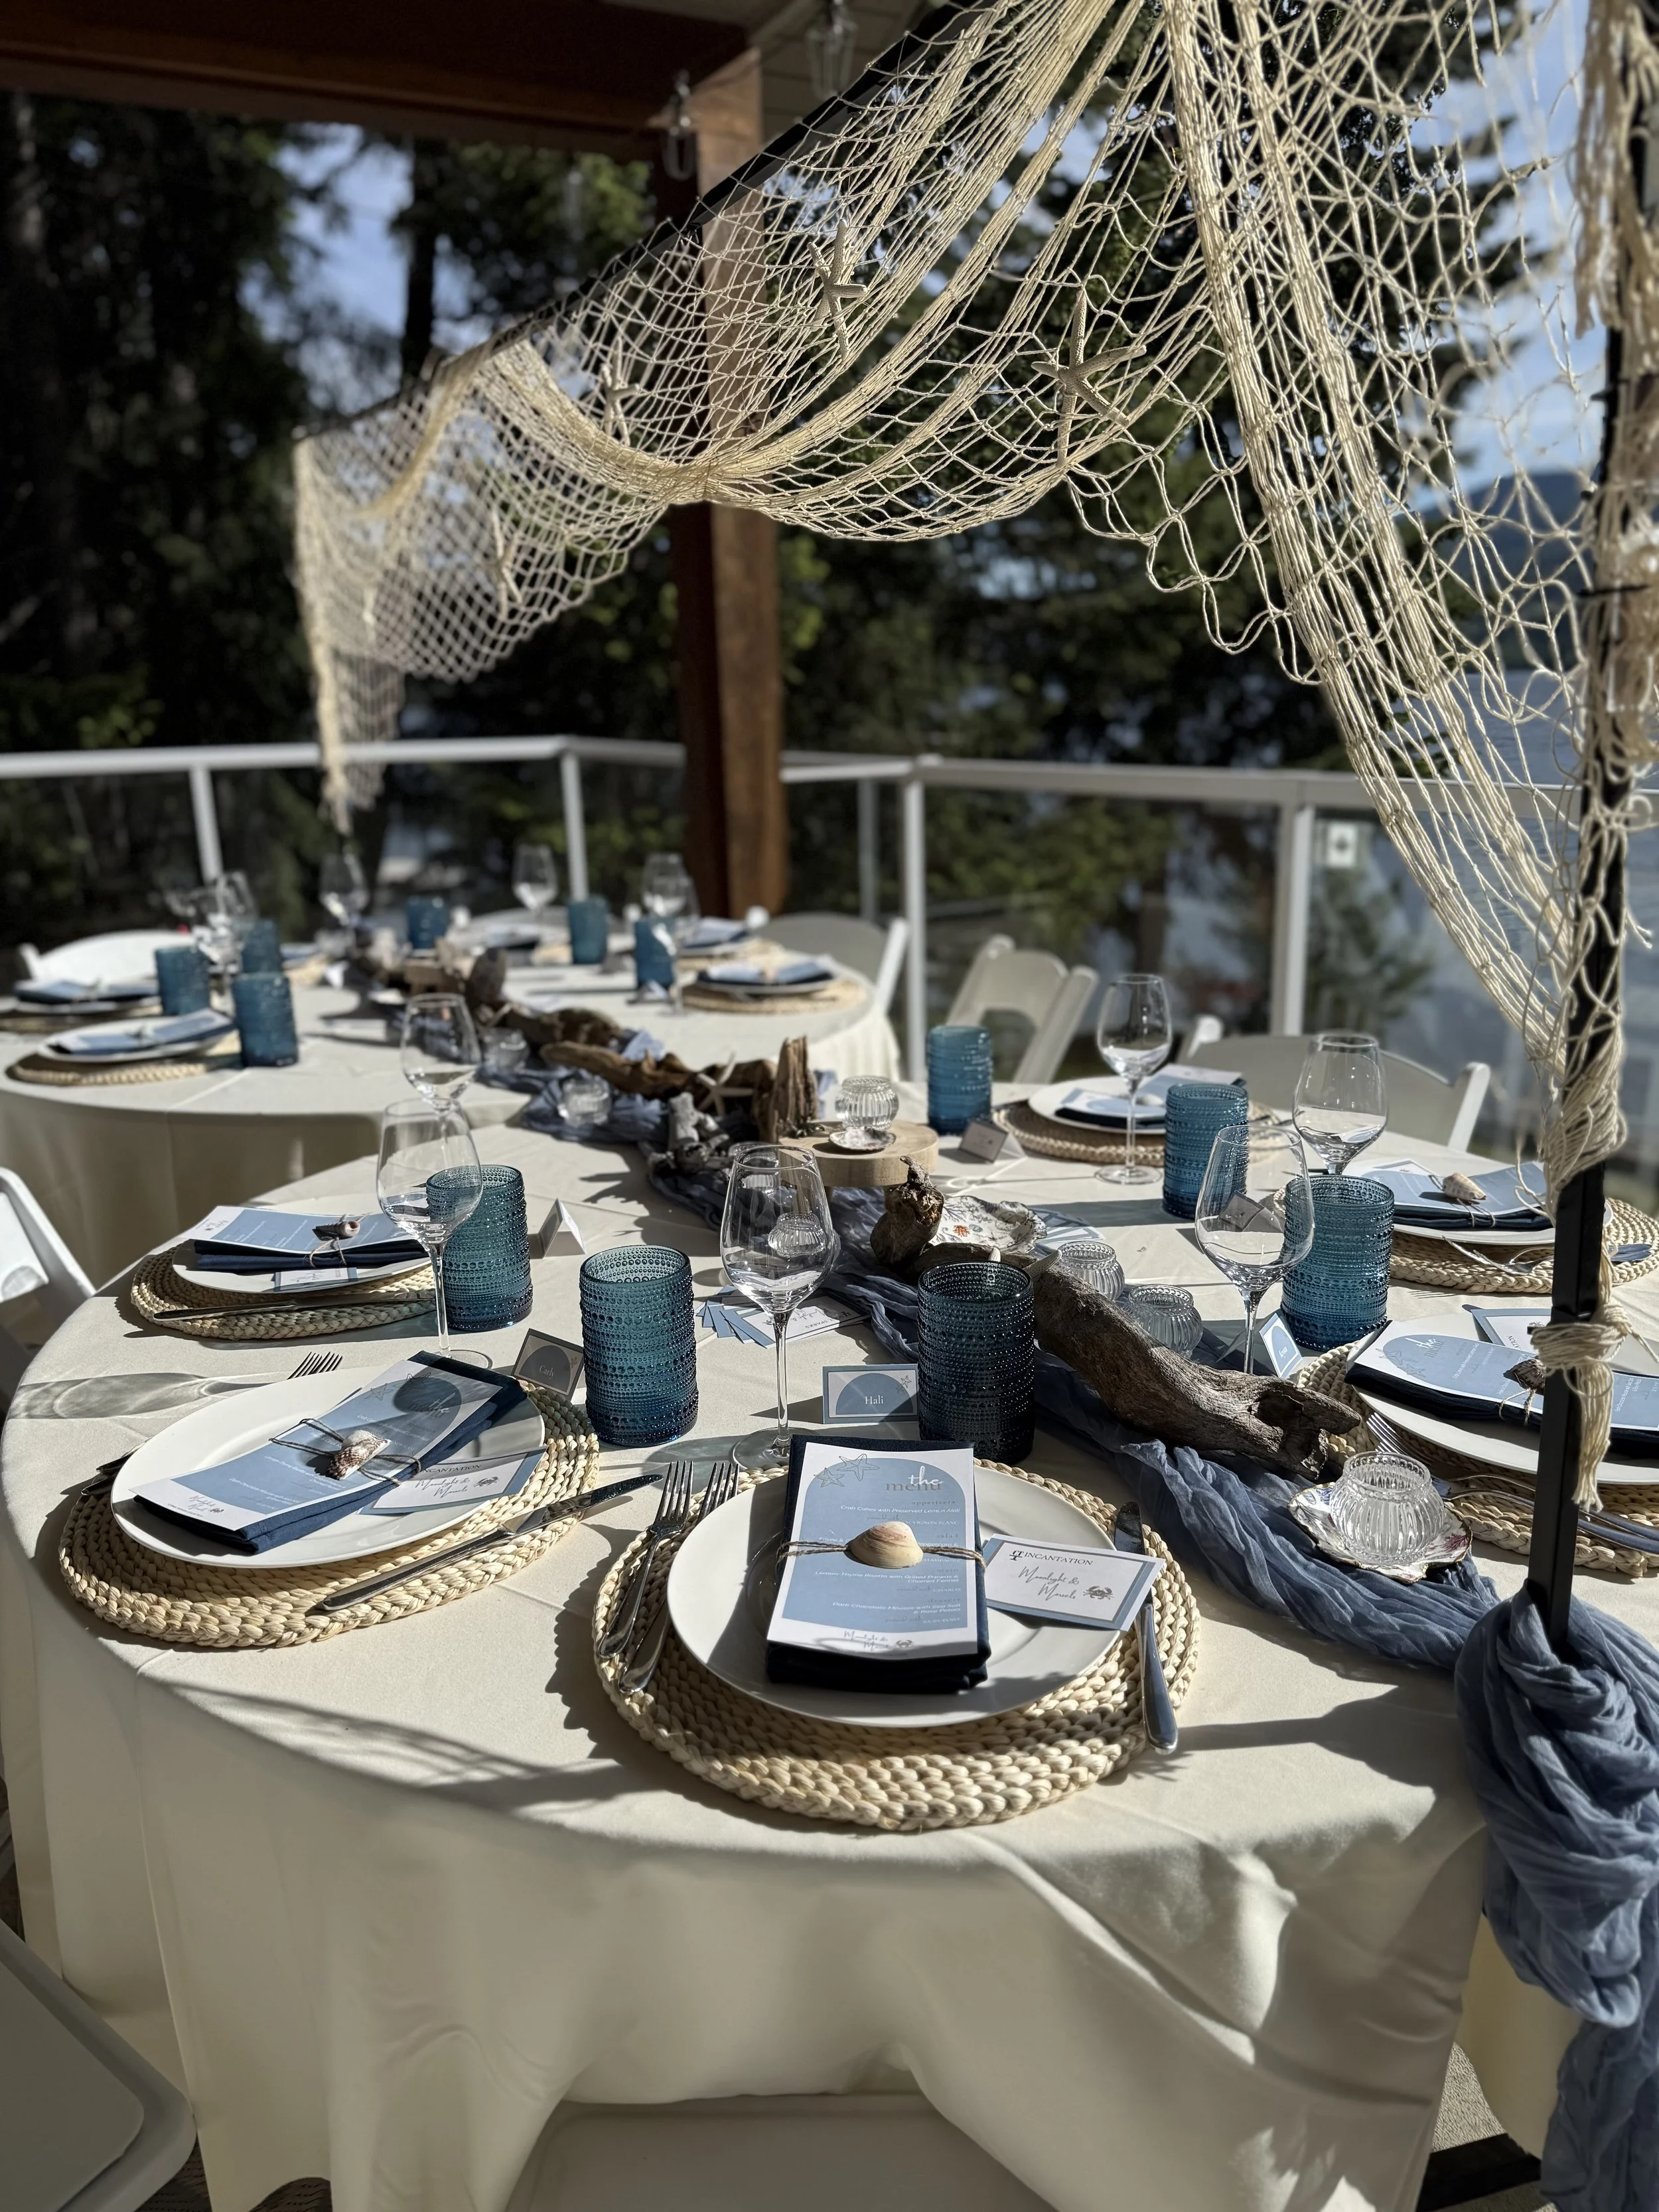
The Table Frame:
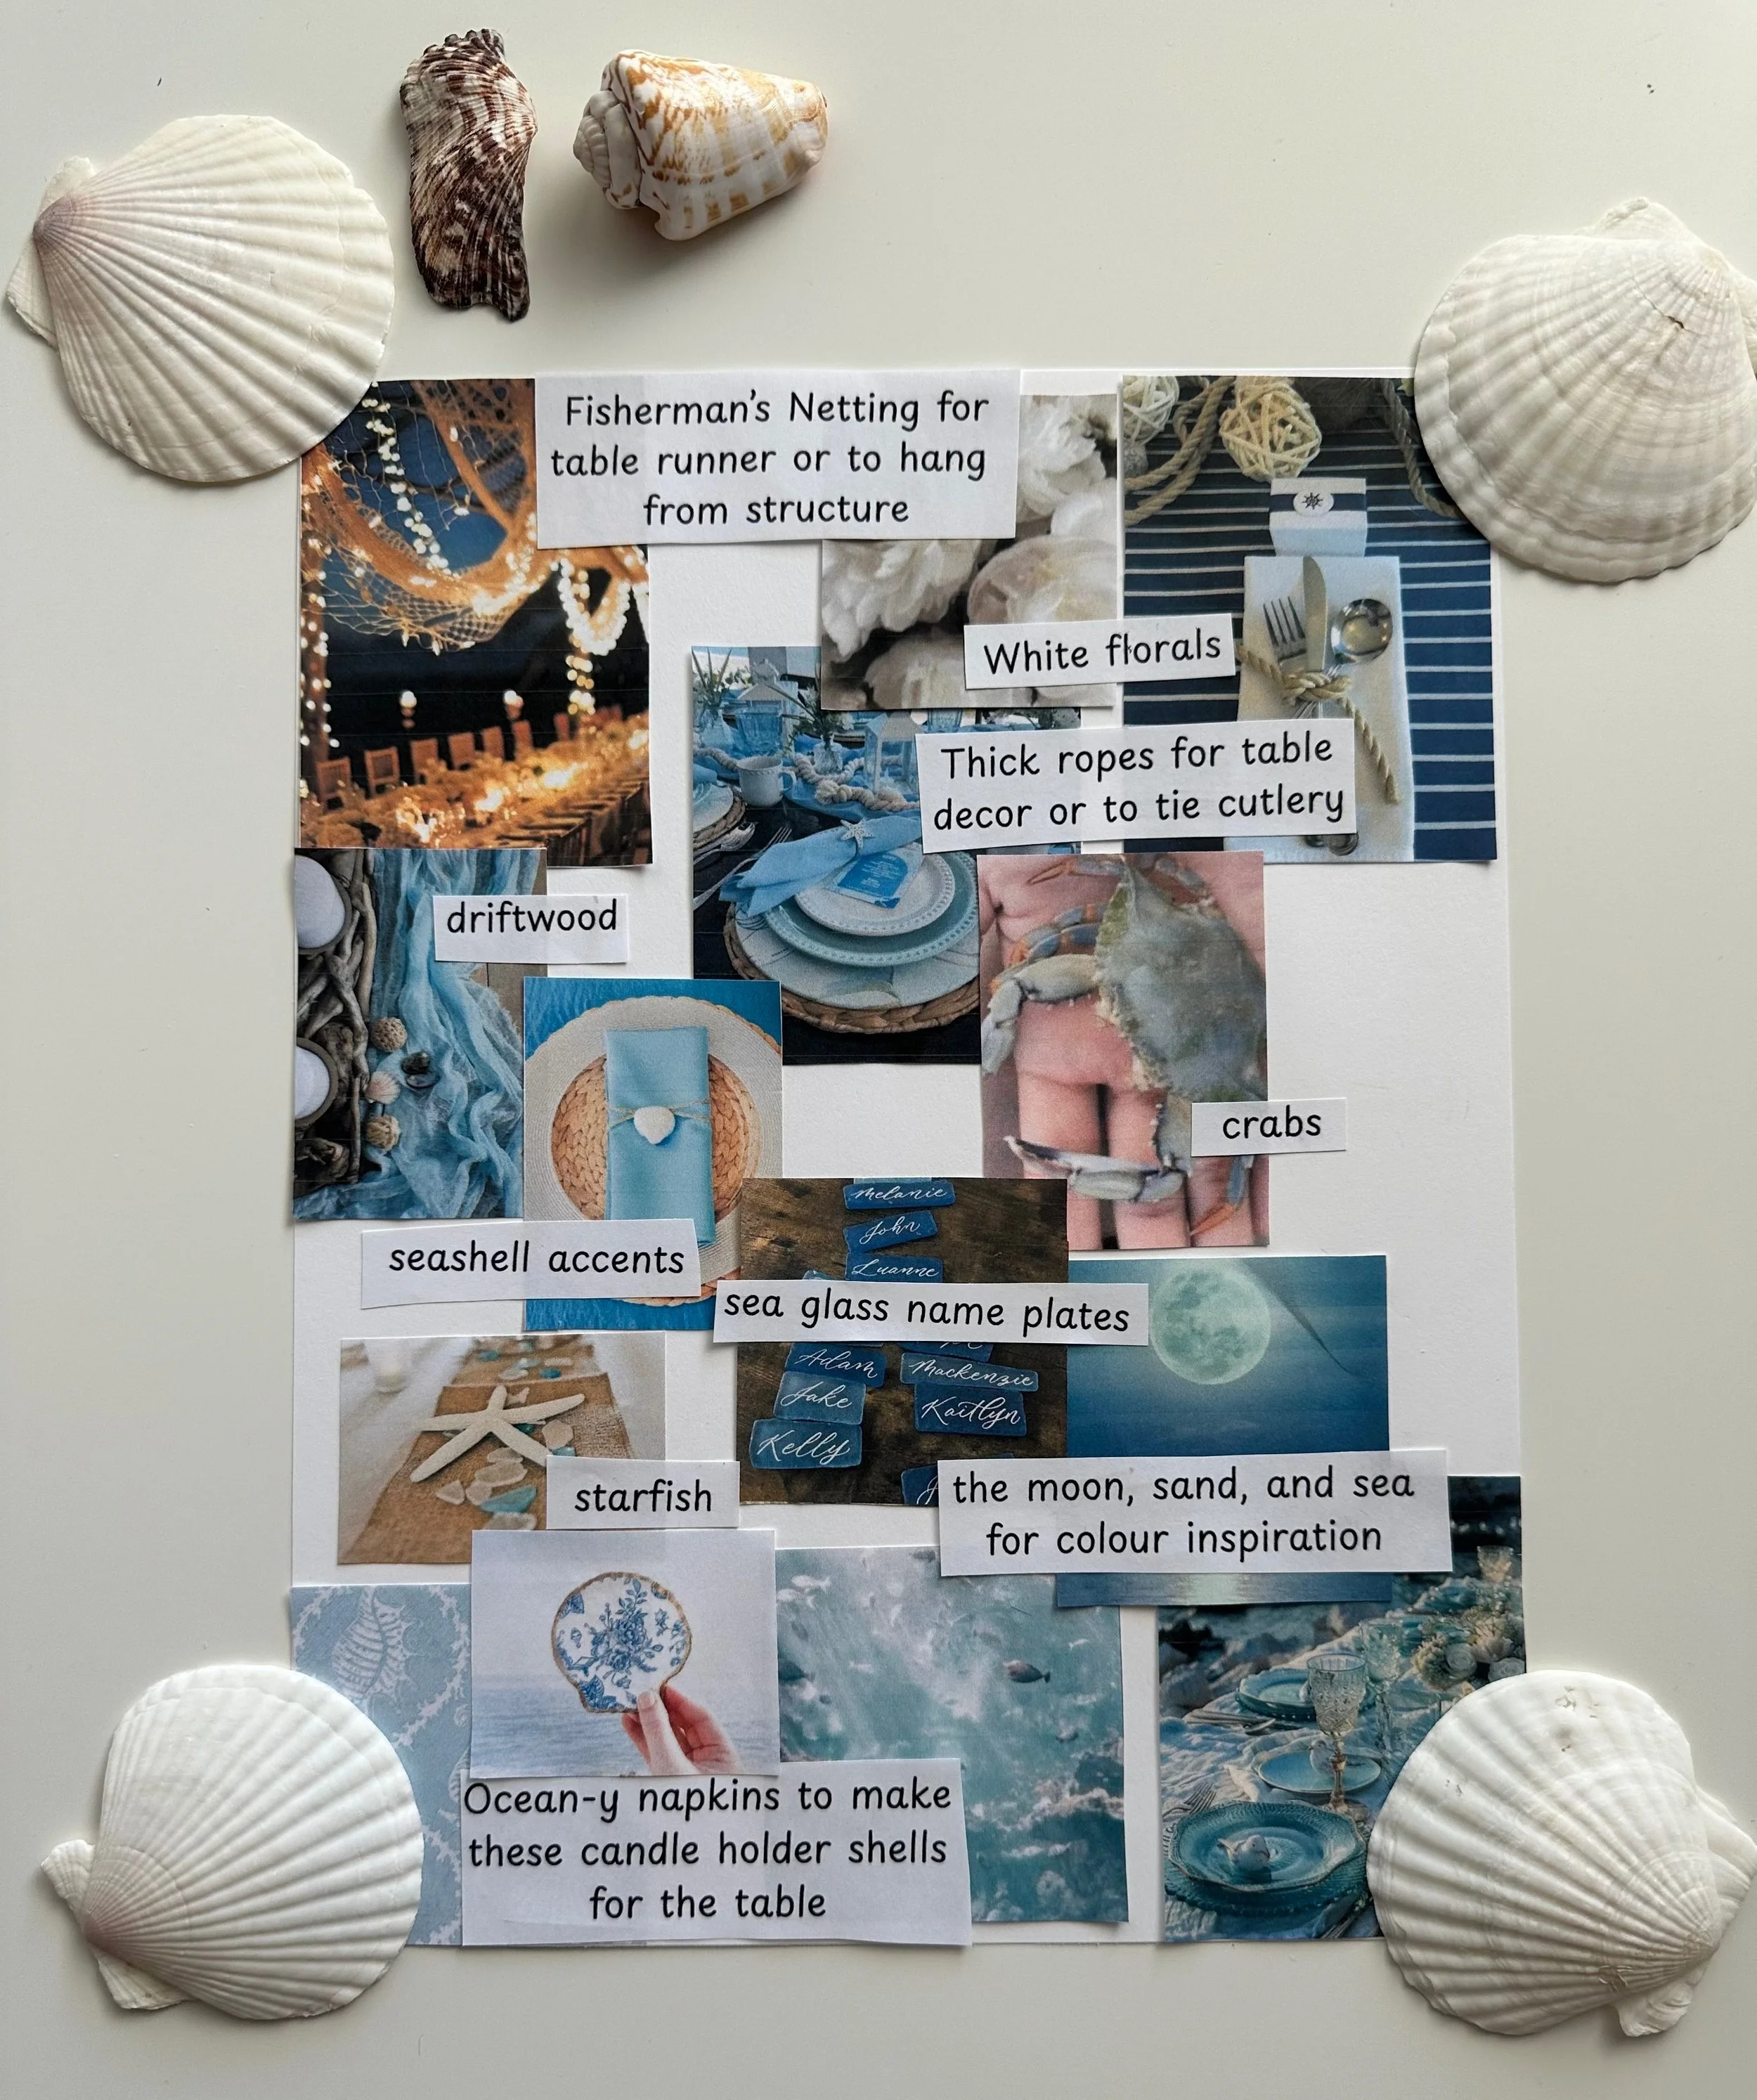
Our beloved table frame (a signature tool in many of our gatherings) allowed us to build height and visual interest right over the table. We draped simple fishing net across the frame — instantly creating texture, a nautical nod, and a bit of whimsy.
Mini Lights + Starfish:
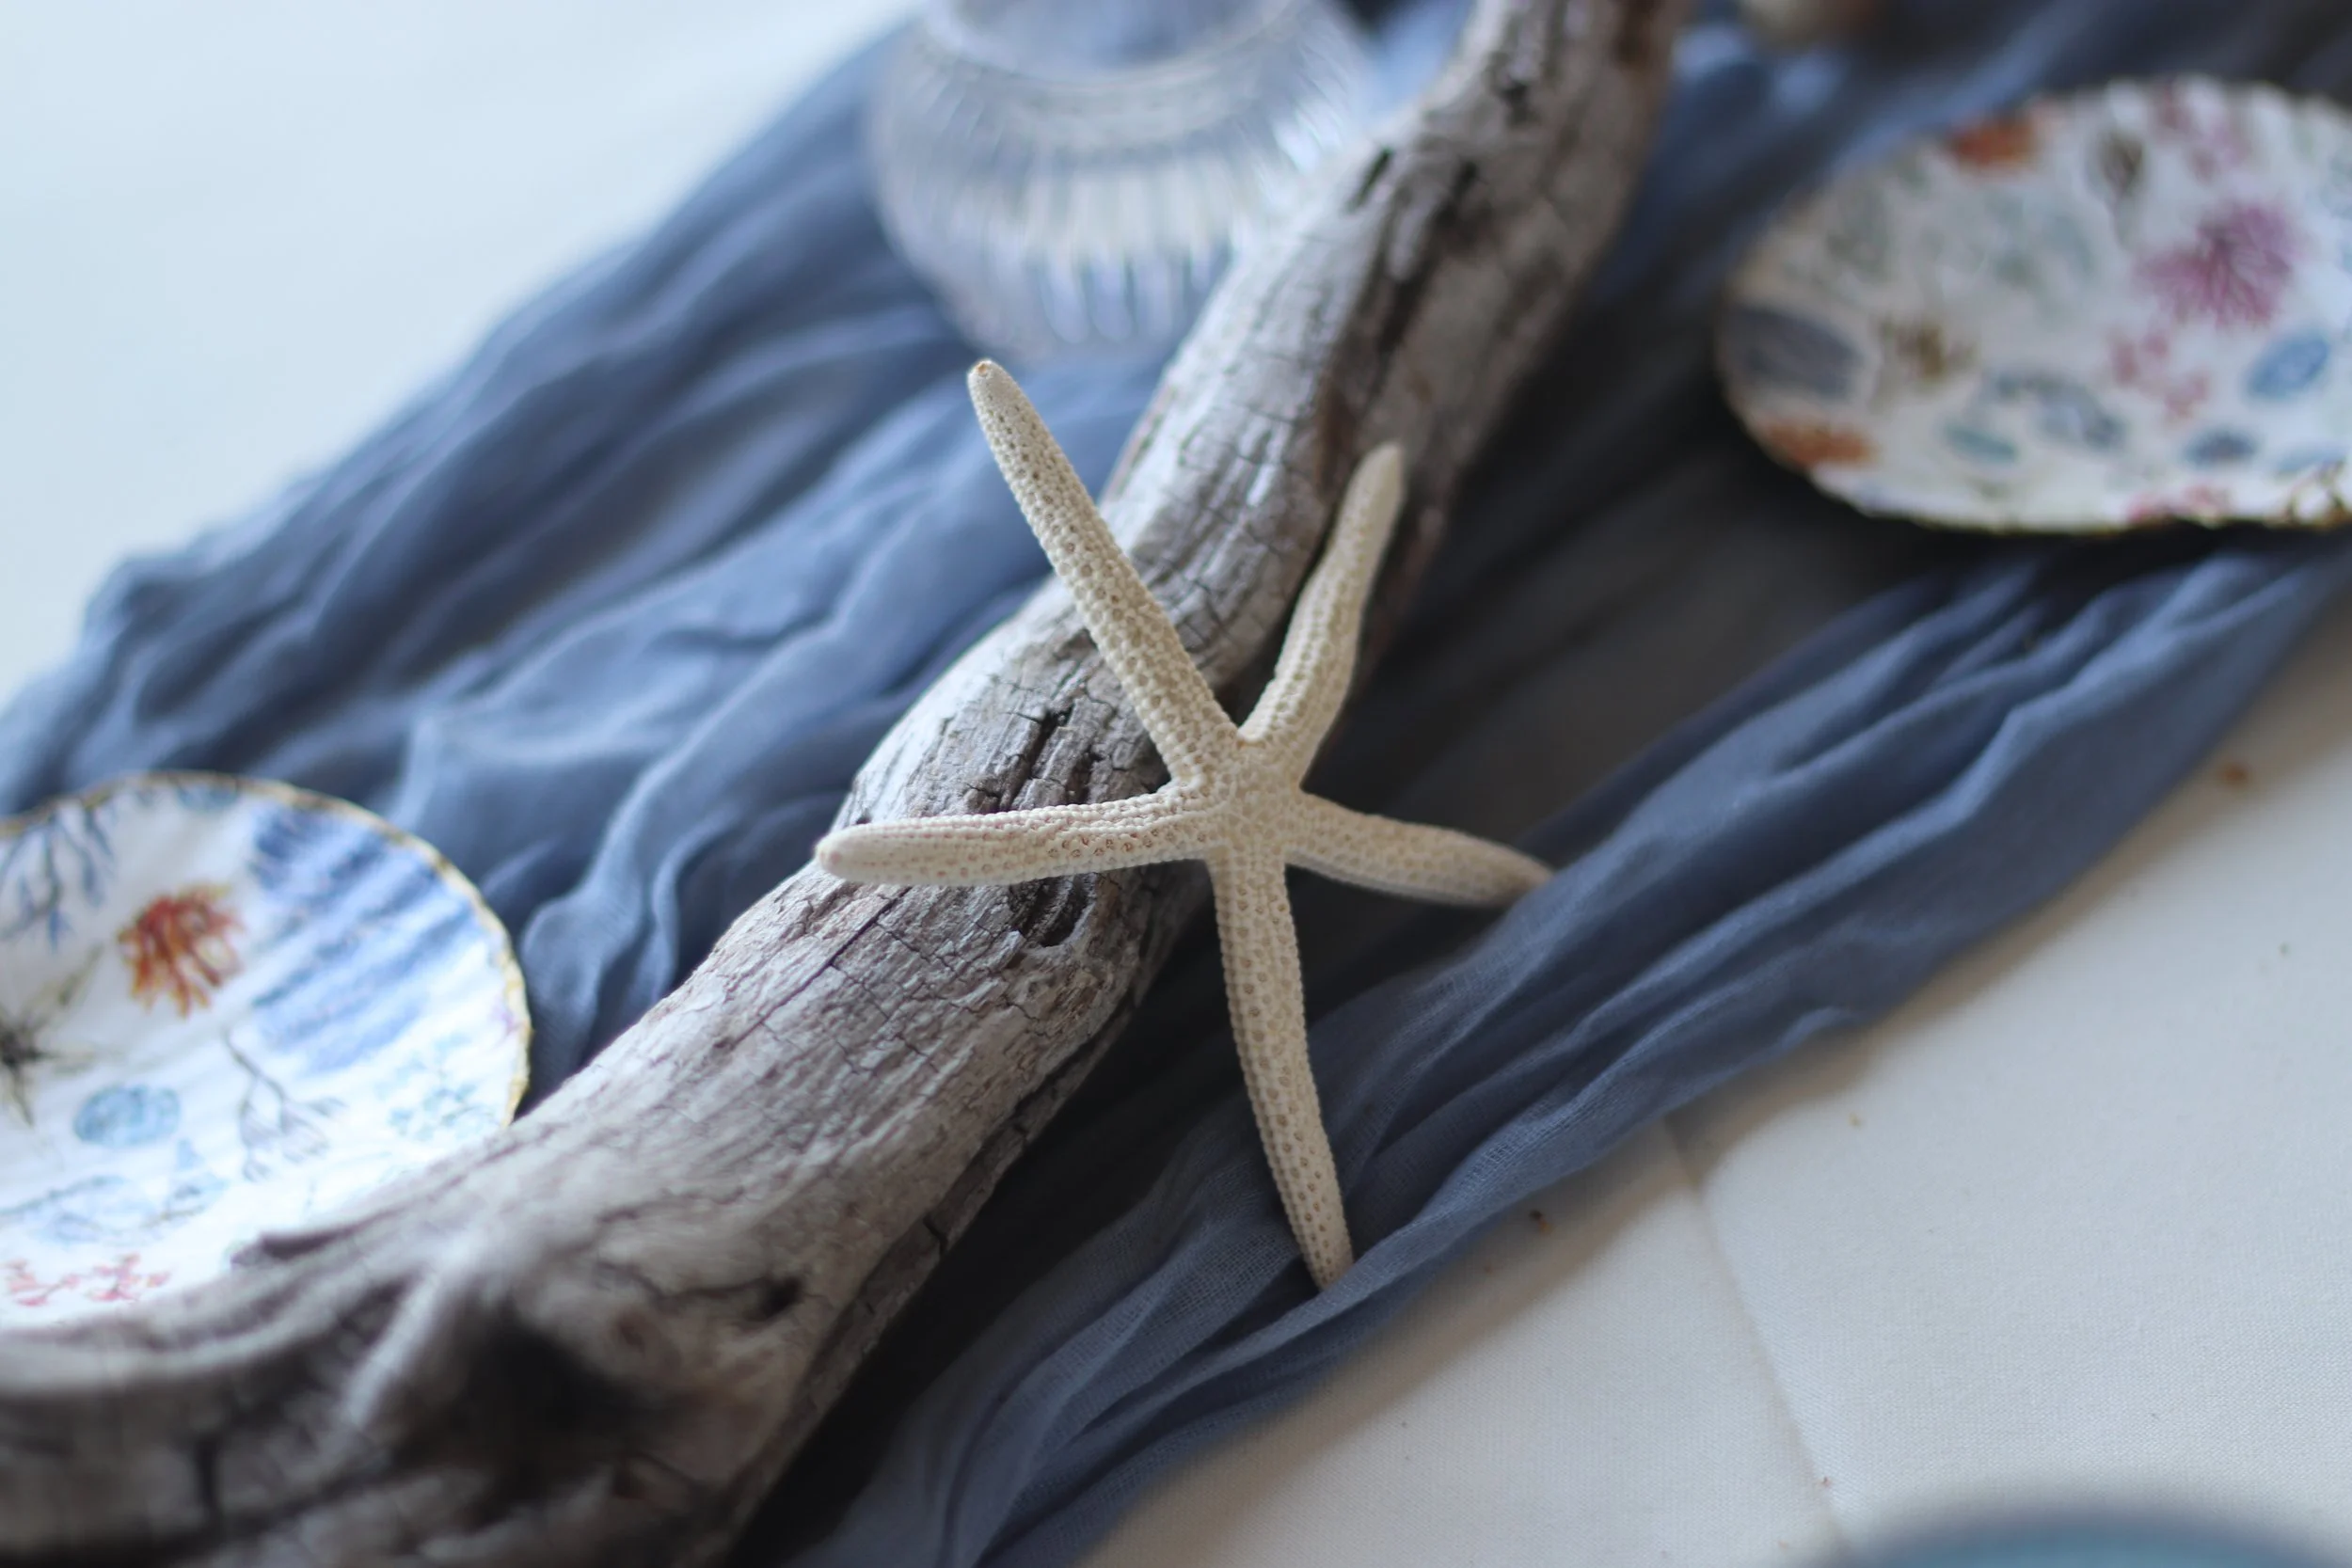
Tiny twinkle lights were woven into the netting, casting a soft, romantic glow as the sun dipped. A few starfish found their way into the net, as if they had floated in just for our gathering. (Spoiler: we may have placed them, but nature totally approved.)
This simple setup gave us a canopy of seaside charm, perfect for any summer tablescape inspiration moment.
Local Touches: Driftwood & Friendship
In true gather your crowd fashion, this tablescape was a team effort.
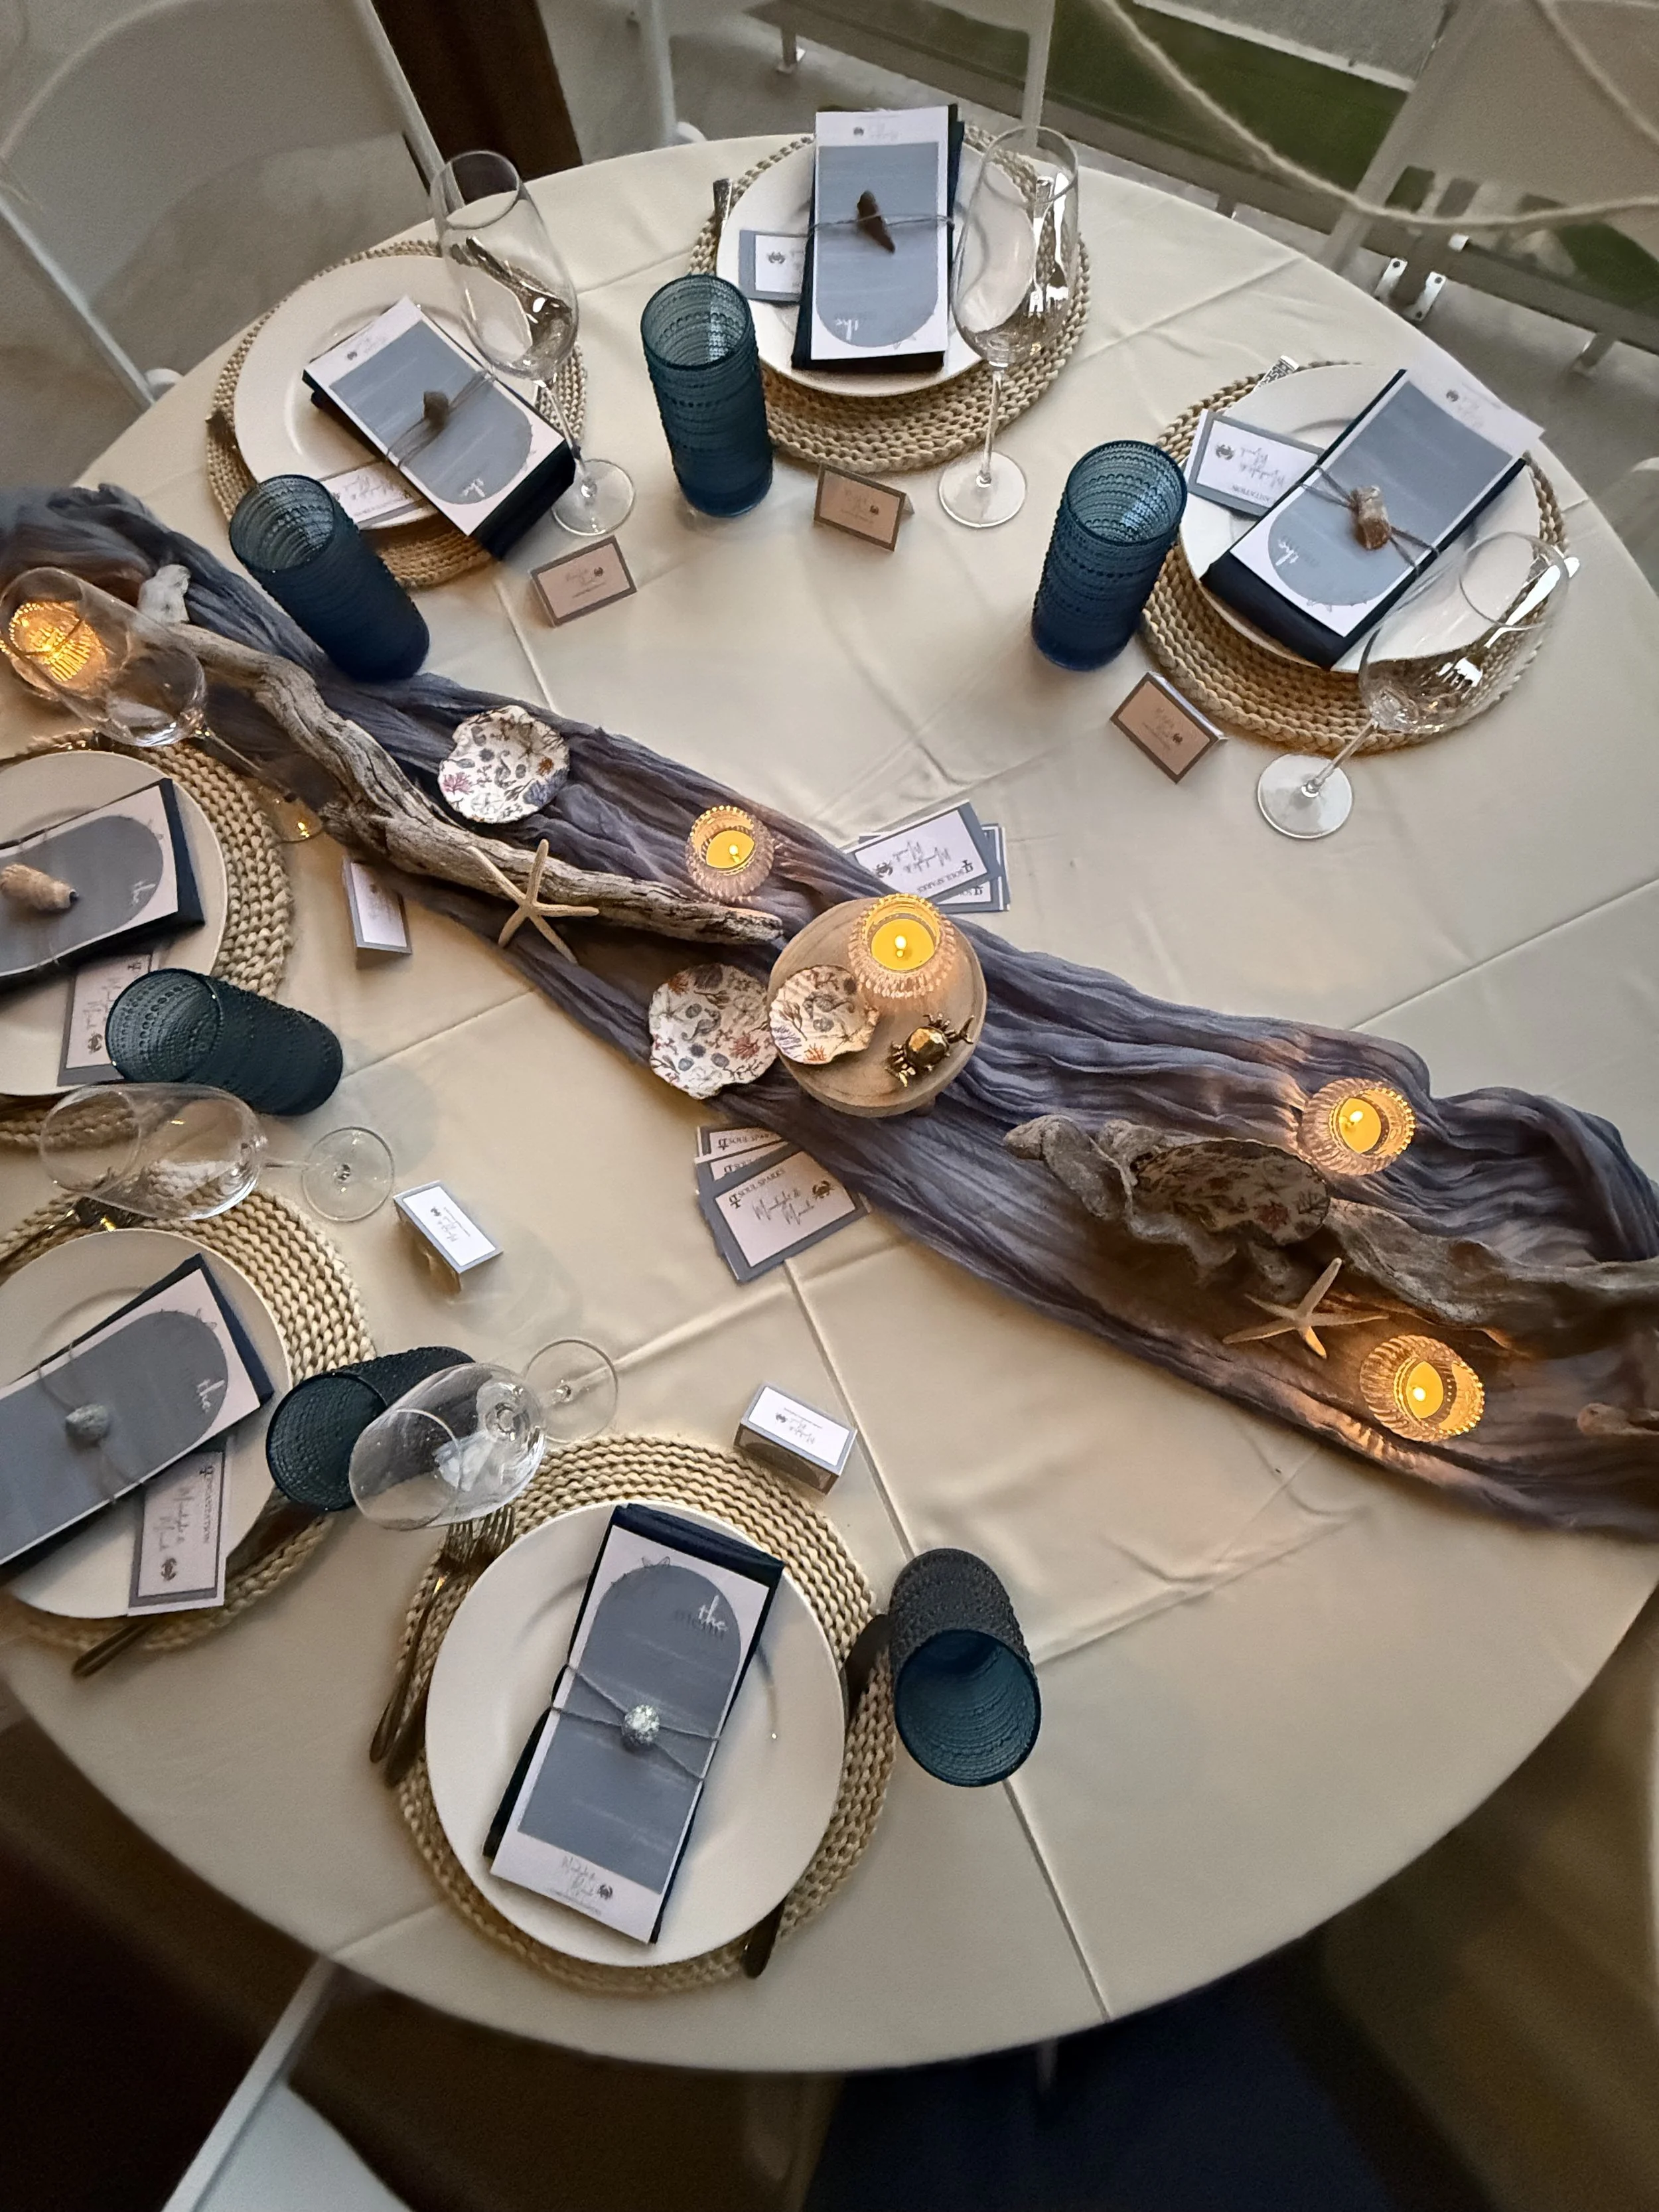
Our dear friend (and guest at the dinner) went on a little scavenger hunt to a nearby lake, collecting beautiful pieces of driftwood that we nestled down the centre of the table. Using local, natural elements like this adds such a personal layer to your tablescape — and serves as a sweet reminder of the community that makes these gatherings special.
The Showstopper: Miranda’s DIY Seashell Trinket Dish
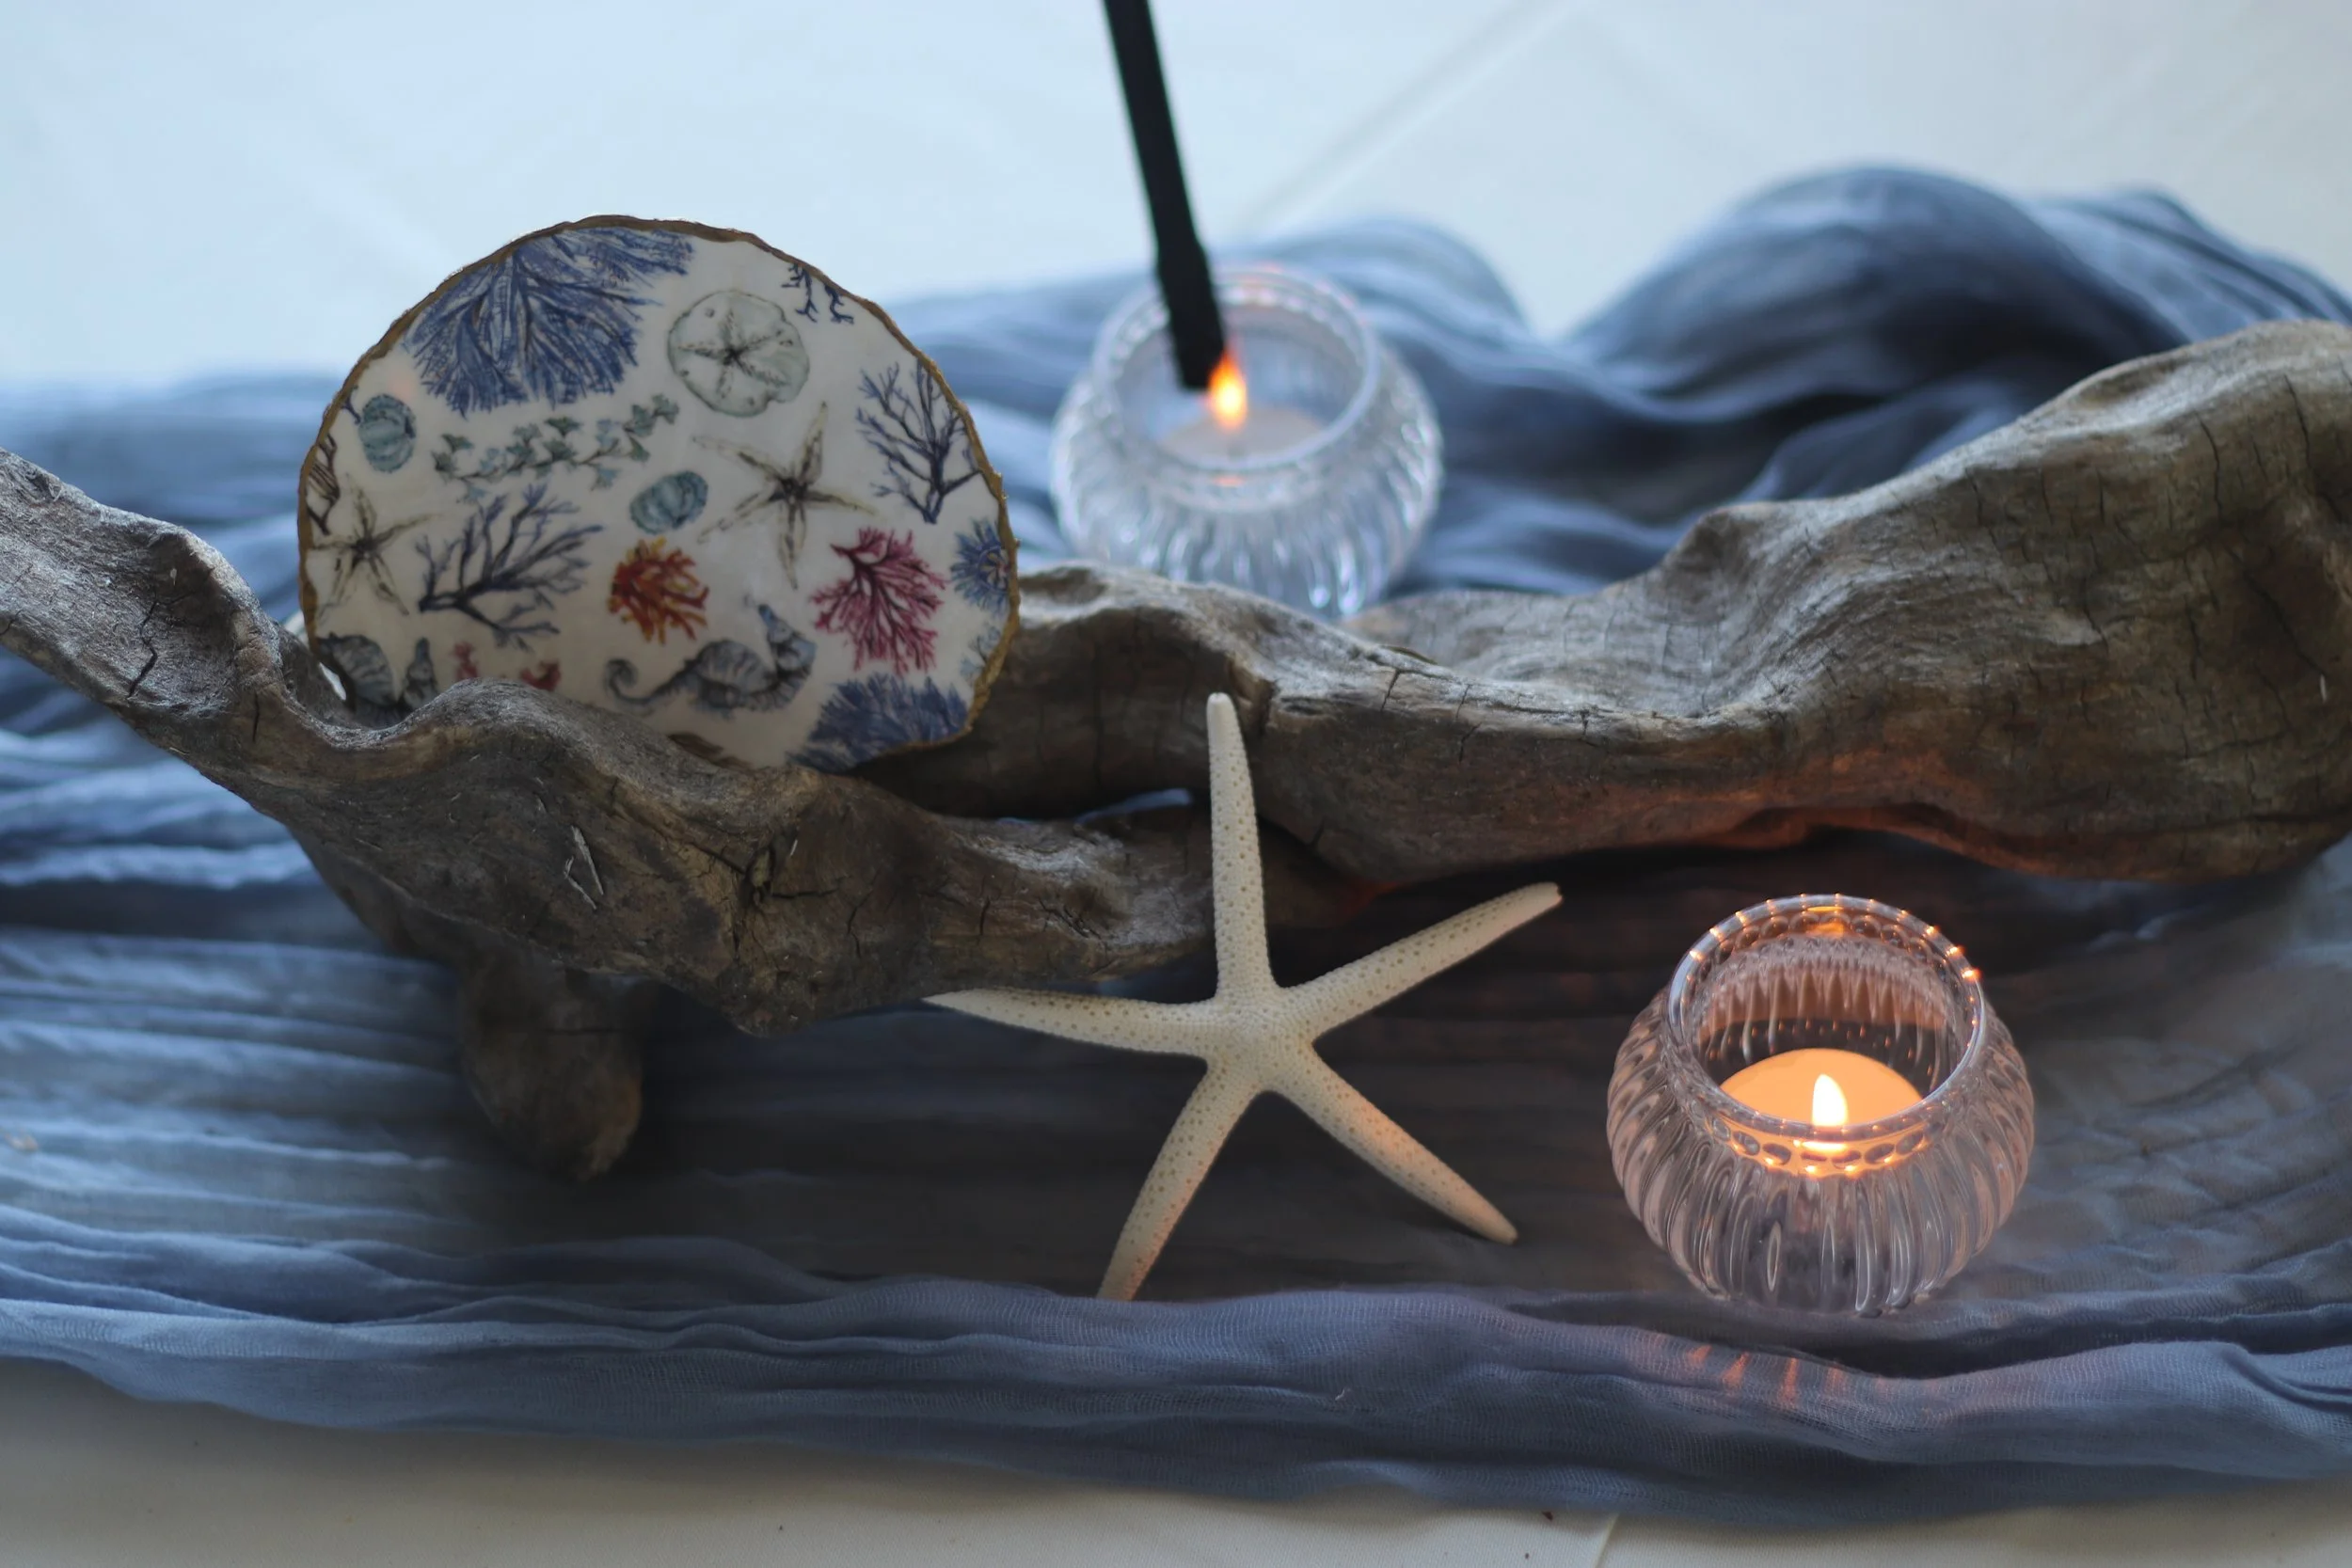
Now let’s talk about the little detail that absolutely stole the show on our Seaside Chic Tablescape: Miranda’s hand-crafted Seashell Trinket Dishes. These beauties weren’t just a pretty face on our table — they added depth, texture, and that perfectly imperfect artisan touch that feels right at home for any elegant coastal tablescape.
Even better? You can easily make them yourself. They’re stunning as part of your centrepiece design, but also make the sweetest hostess gifts, crowd-pleasing favours, or charming ring dishes for your windowsill. ✨
Here’s exactly how Miranda worked her magic:
How to Make the Seashell Trinket Dish
Supplies You’ll Need:
Clean scallop shells (natural or store-bought)
White acrylic paint
Decorative paper napkins (the prettier the better!)
Mod Podge (matte or gloss depending on your preference)
Spray bottle with water
Small paintbrush
Gold acrylic paint
Step 1: Paint the Shell Base
Start by painting the inside of your shell white. This helps cover any natural yellowing that might peek through your napkin later and gives you a clean, bright canvas.
Step 2: Prep Your Napkin
Separate the layers of your napkin, gently peeling away until you're left with the single, decorative layer. This is your star player!
Step 3: Cut to Fit
Roughly cut your napkin into a piece that will cover the inside of your shell. Don’t stress about perfect measurements — leaving a little extra around the edges will give you some wiggle room as you work.
Step 4: Apply the Mod Podge
Brush a thin layer of Mod Podge directly onto the inside of your shell. Make sure you’ve got full coverage, but not too thick — think “even and happy.”
Step 5: Lightly Mist Your Napkin
Give both the front and back of your napkin piece a very light spritz of water. This helps soften the paper and makes it easier to mold to your shell’s curves without tearing.
Step 6: Gently Press + Smooth
Carefully place your napkin onto the shell, starting from the center and working your way out. Use one finger to tap and smooth the napkin down until it’s flush with the shell. (Patience is your best friend here.)
Step 7: Remove the Excess
Once your napkin is secure, gently tear away any napkin hanging over the shell’s edge. If it's being a little stubborn, give it another quick spritz of water to soften the fibers and make the ripping easier.
Step 8: Don’t Panic If It Tears
Little tears? No problem! You’ve got two options:
Leave them for a perfectly imperfect, aged, vintage look.
Or patch with a small piece of extra napkin. Both are beautiful.
Step 9: Seal It Up
Brush a light layer of Mod Podge over the top of your napkin, making sure you seal the edges well. If any edges fold over the back — let them! We’ll cover those later.
Step 10: Let It Dry
Allow everything to dry completely before flipping.
Step 11: Paint the Back
Once dry, flip your shell over and paint the backside with gold acrylic paint. You’ll likely need about 3 coats for full coverage. The gold gives the piece a gorgeous, elevated finish.
Step 12: Add the Edging
Finally, using a small paintbrush, add a thin band of gold around the rim of the shell. This edging gives a soldered, stained-glass vibe — elevating your DIY scallop shell napkin holder into a true little work of art.
Step 13: Display or Gift
Once everything is dry and set, your trinket dish is ready to shine! These beauties make:
Stunning centrepieces (like we used for our lakeside dinner party)
Sweet hostess or thank-you gifts
Ring dishes for your windowsill
Tea bag holders at your breakfast nook
Little crowd-pleasers for any tabletop
✨ Hosting Tip:
Make a few extra to keep on hand — these are those magical "Oh! I have the perfect little gift for you" moments waiting to happen.
Place Setting Layers: Texture Meets Elegance
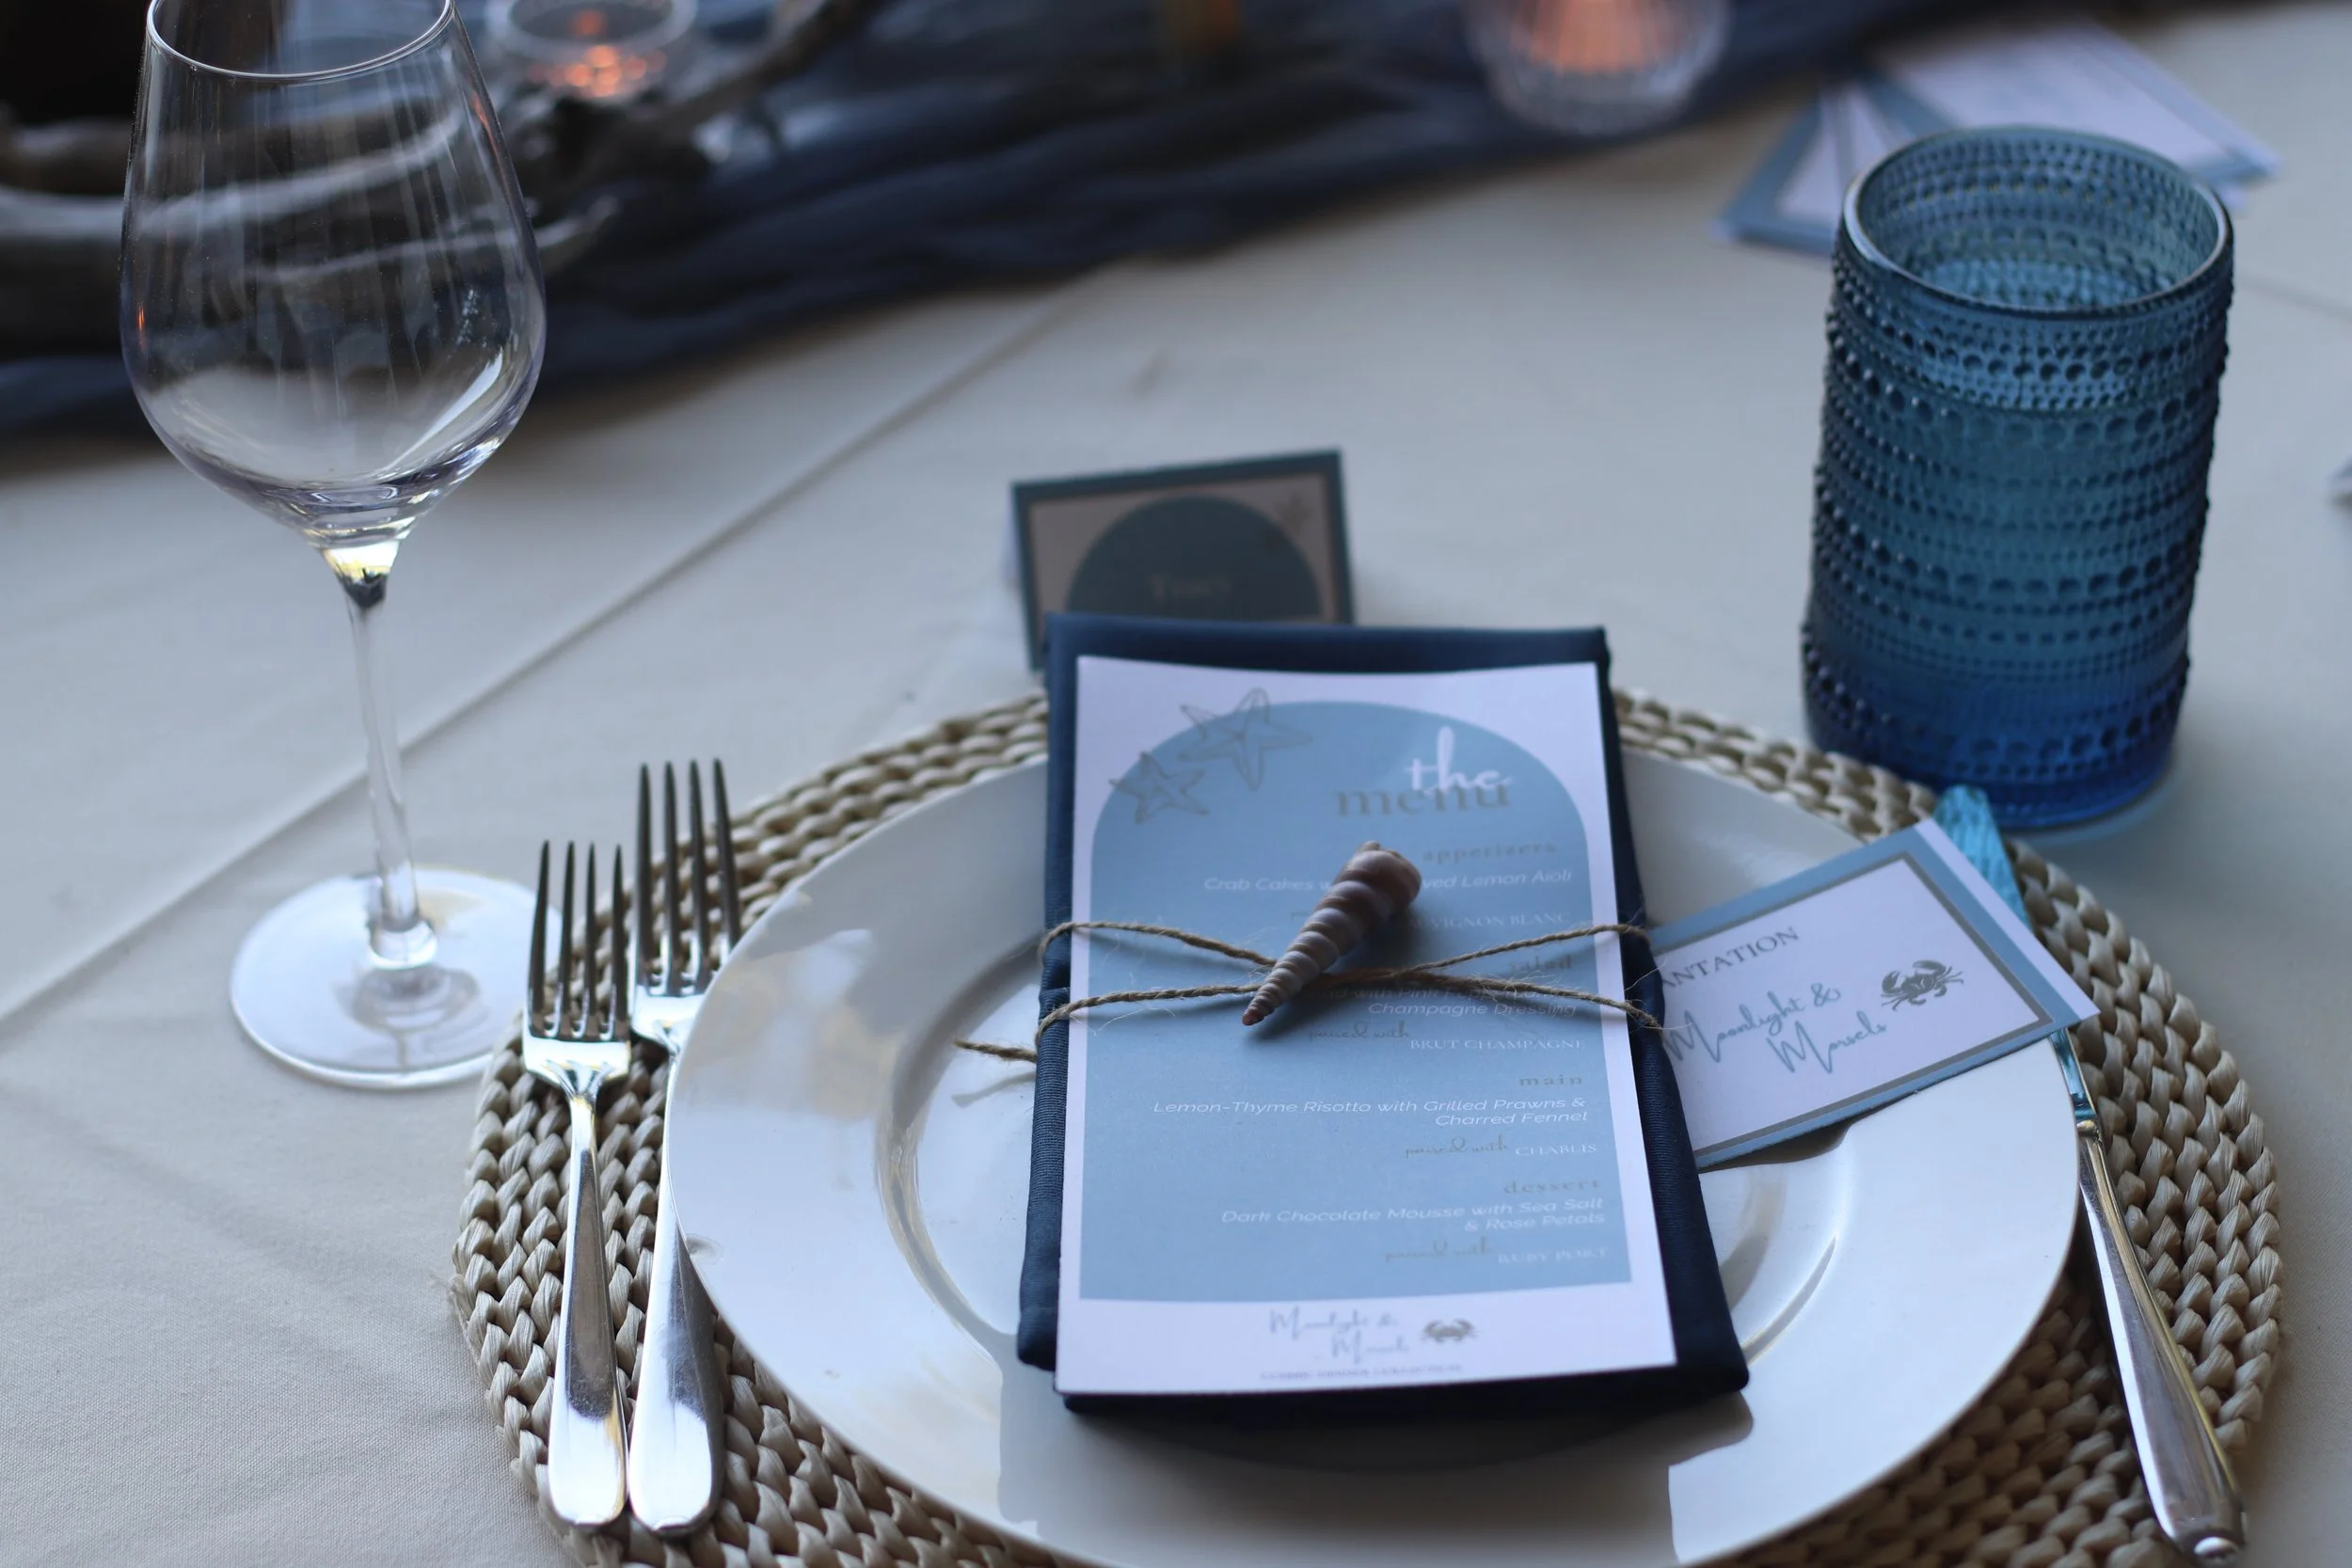
The layers came together like this:
Woven placemats added texture and grounded each setting.
Dark blue cloth napkins gave a rich, moody contrast.
Vintage navy glasses brought in depth and old-world charm.
Menus + napkins wrapped in twine, topped with a seashell for an organic coastal touch.
Mini bronze crabs and more starfish tucked playfully throughout the table.
Crystal tealight holders added sparkle, while rustic wood risers gave height variation across the tablescape.
The result? A coastal lake party decor dreamscape that felt intentional, elevated, and completely at home with the Cancer vibe.
Why This Tablescape Reflects Cancer Energy
Cancer rules home, comfort, and deep emotional connection. As a water sign, it invites us to nurture, protect, and create cozy spaces for those we love. Designing this Cancer zodiac dinner party allowed us to embody all of that — literally setting the table for intimate conversations, heartfelt laughter, and soul-filling moments.
The lakeside setting offered its gentle soundtrack of lapping waves, crickets, and distant loons — a natural symphony that reminded us: this is what hosting inspired gatherings is all about.
Join Our Table
If you loved this peek behind the scenes of our Seaside Chic Tablescape, you’ll love diving deeper inside our full Moonlight & Morsels Cancer Dinner Gathering Guidebook. Inside the guidebook you’ll find:
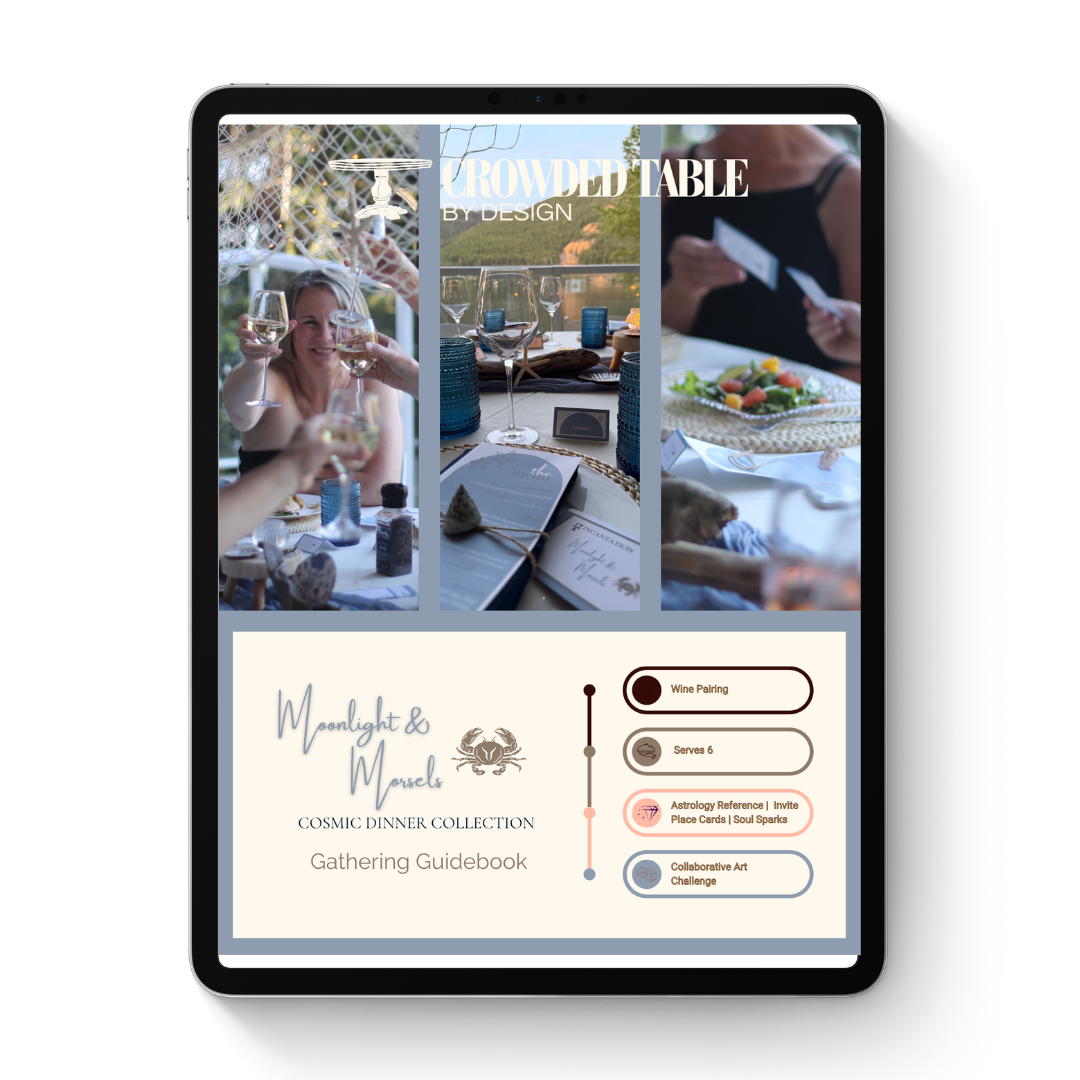
The full menu (yes, including those crave-worthy crab cakes!)
Wine pairings + shopping lists
A step-by-step prep timeline (aka: no last-minute stress)
Table styling tutorials
Our opening incantation to set the mood
A curated Moonlight & Morsels playlist
Printable menus, invitations & name cards
✨ There’s always a place for you at our table. ✨
👉 Get your Moonlight & Morsels Guidebook here
Join Our Table and unlock a world of possibilities! Sign up for 20% off your first purchase. You'll also receive instant access to our latest recipes, expert gathering guidance, crowd-pleasing tips, and a curated tabletop finds to elevate your next gathering.
Crowd your table, feed your soul! Let's create memories that will last a lifetime, together.